Zoom Branches
Zoom session 3 — part 1
Access: You should have received the meeting id and password by email.
Time: 3 pm Pacific Time.
What is a branch?
A branch is a pointer to a commit (under the hood, it is a small file containing the 40 character SHA-1 checksum of the commit it points to).
Why use multiple branches?
If your changes are very disruptive and break code, you still have a fully functional branch to go back to if needed.
You can create a branch for each alternative approach. This allows you to jump back and forth between various alternatives to implement an idea.
If you want to start working on a totally different aspect of the project while you haven't finished a development idea, you can go back to the main branch and create a new branch from there. This prevents having messy incomplete work all over the place on the same branch.
How to create a branch?
Initial branch (master)
When you run git init to initialize a repository, a branch gets created and it is called master (you could rename it to something else if you wanted—that initial branch, despite its name, has nothing special).
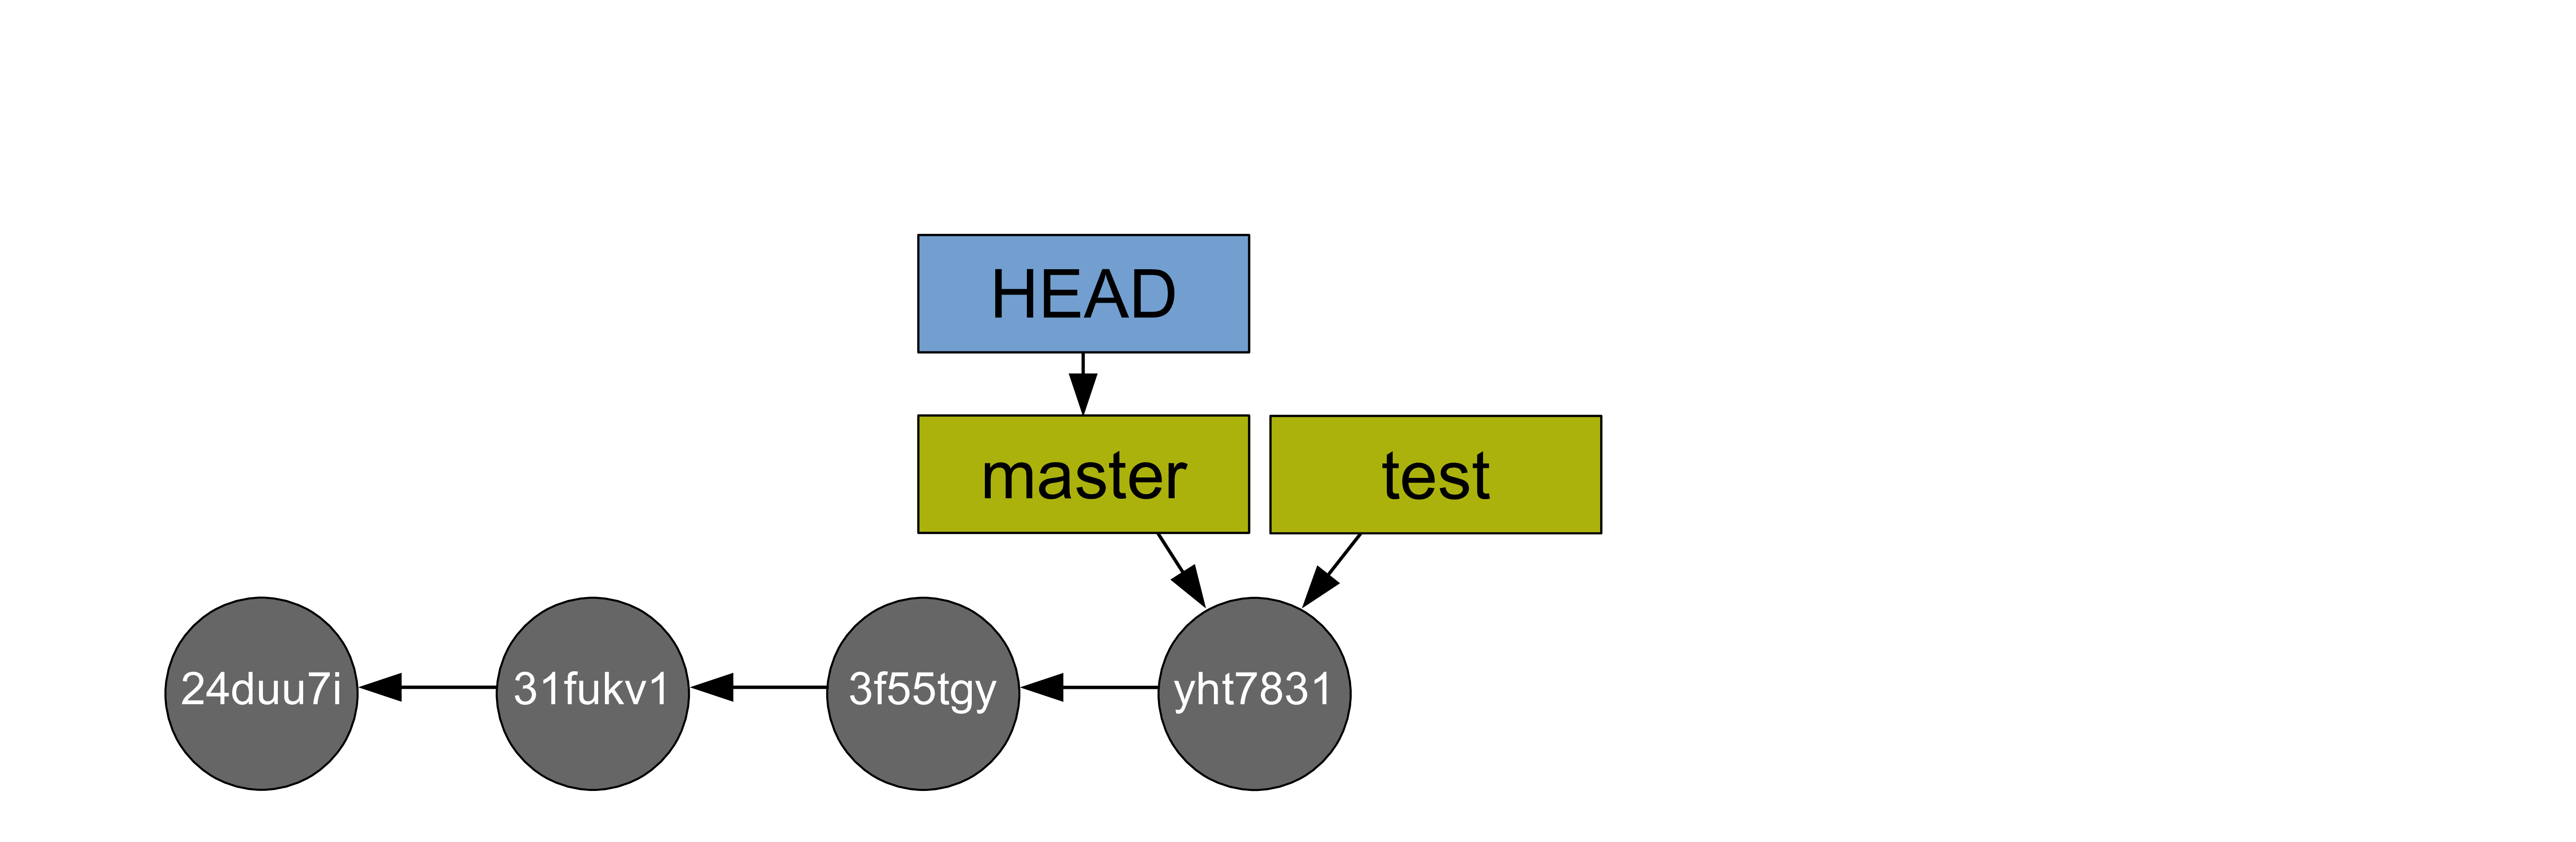
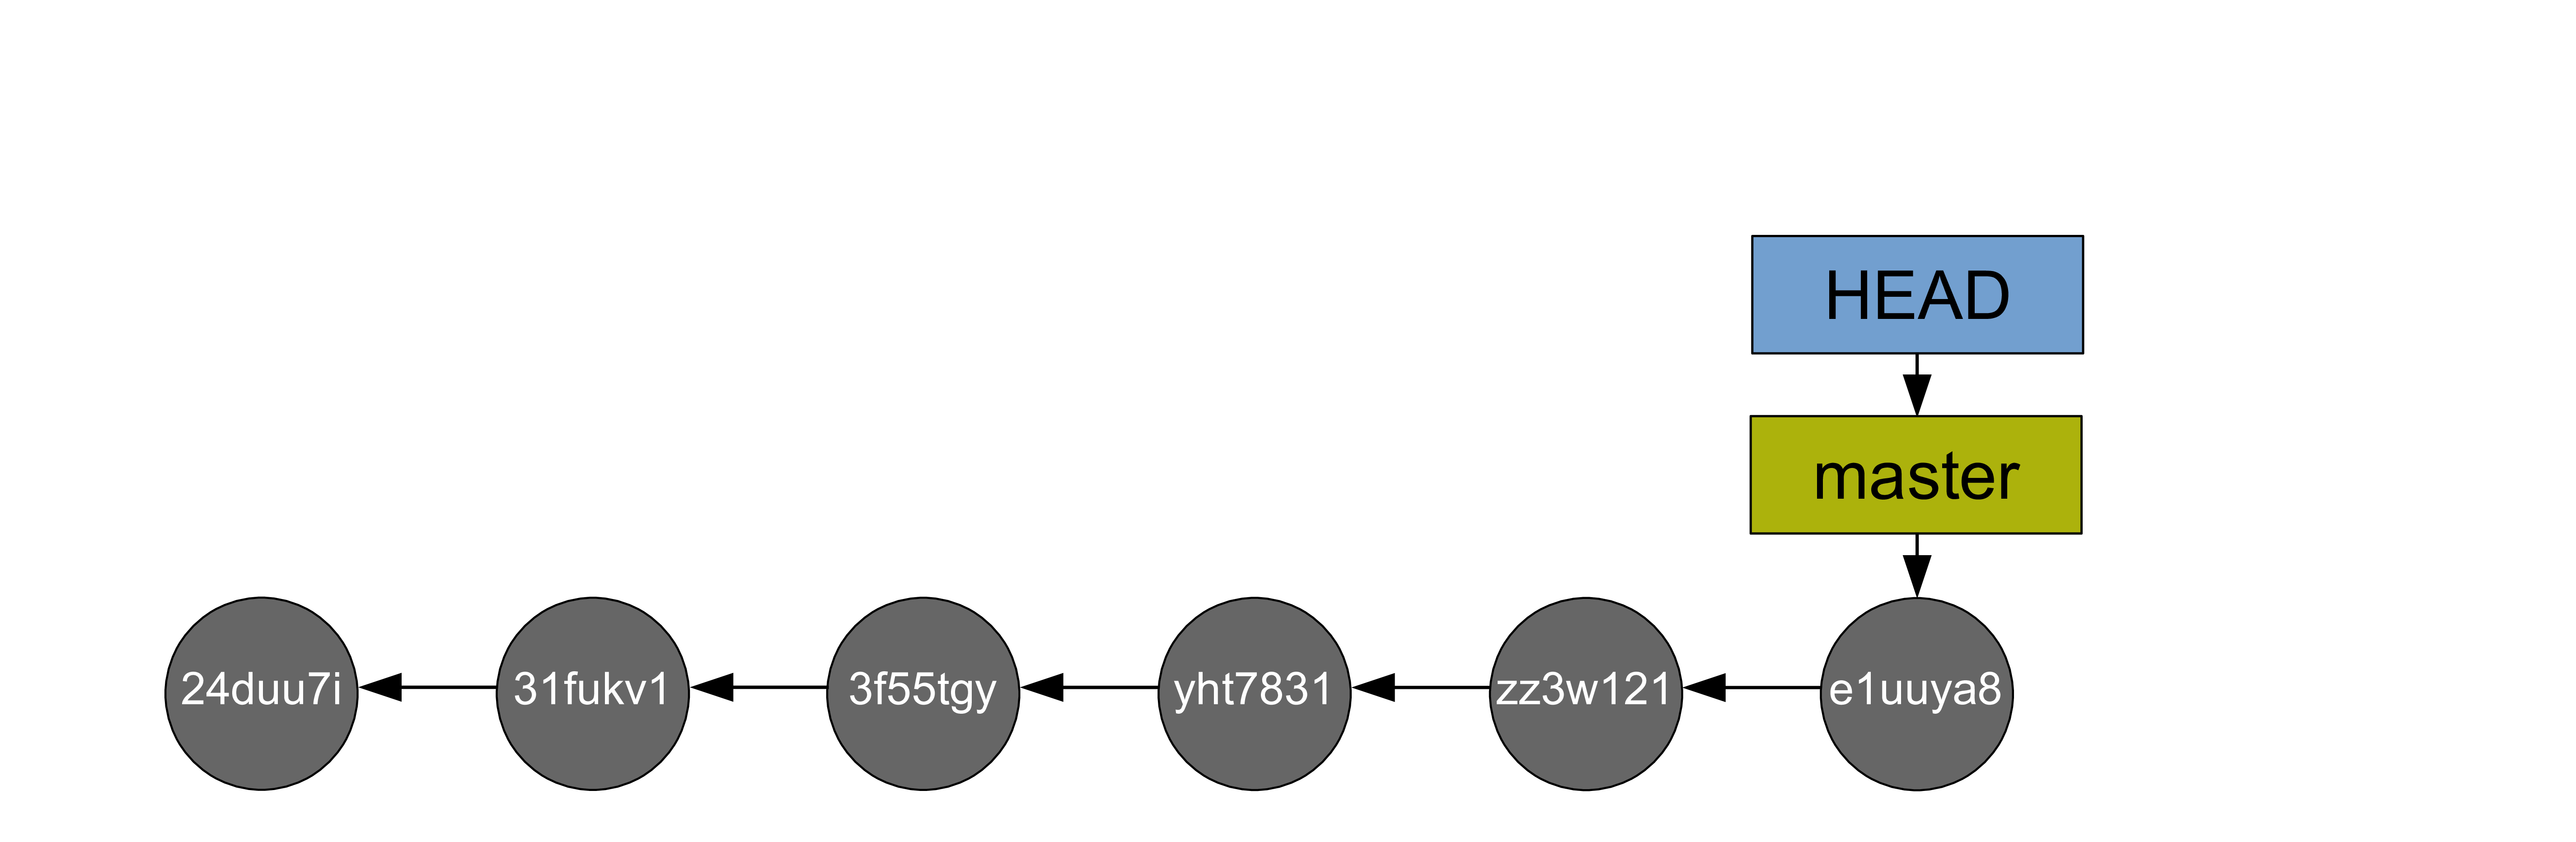
So as soon as you start working on your project, there is one branch (master) and you are on it. Wait… what does this mean to be on a branch? There is another pointer called HEAD that keeps track of where you are. And HEAD points to master.
This is what On branch master means in the output of git status.
This is also what (HEAD -> master) means when you run git log (you need to create at least one commit before you can run git log).
Additional branches
You can create additional branches with:
git branch <branch-name>
Example:
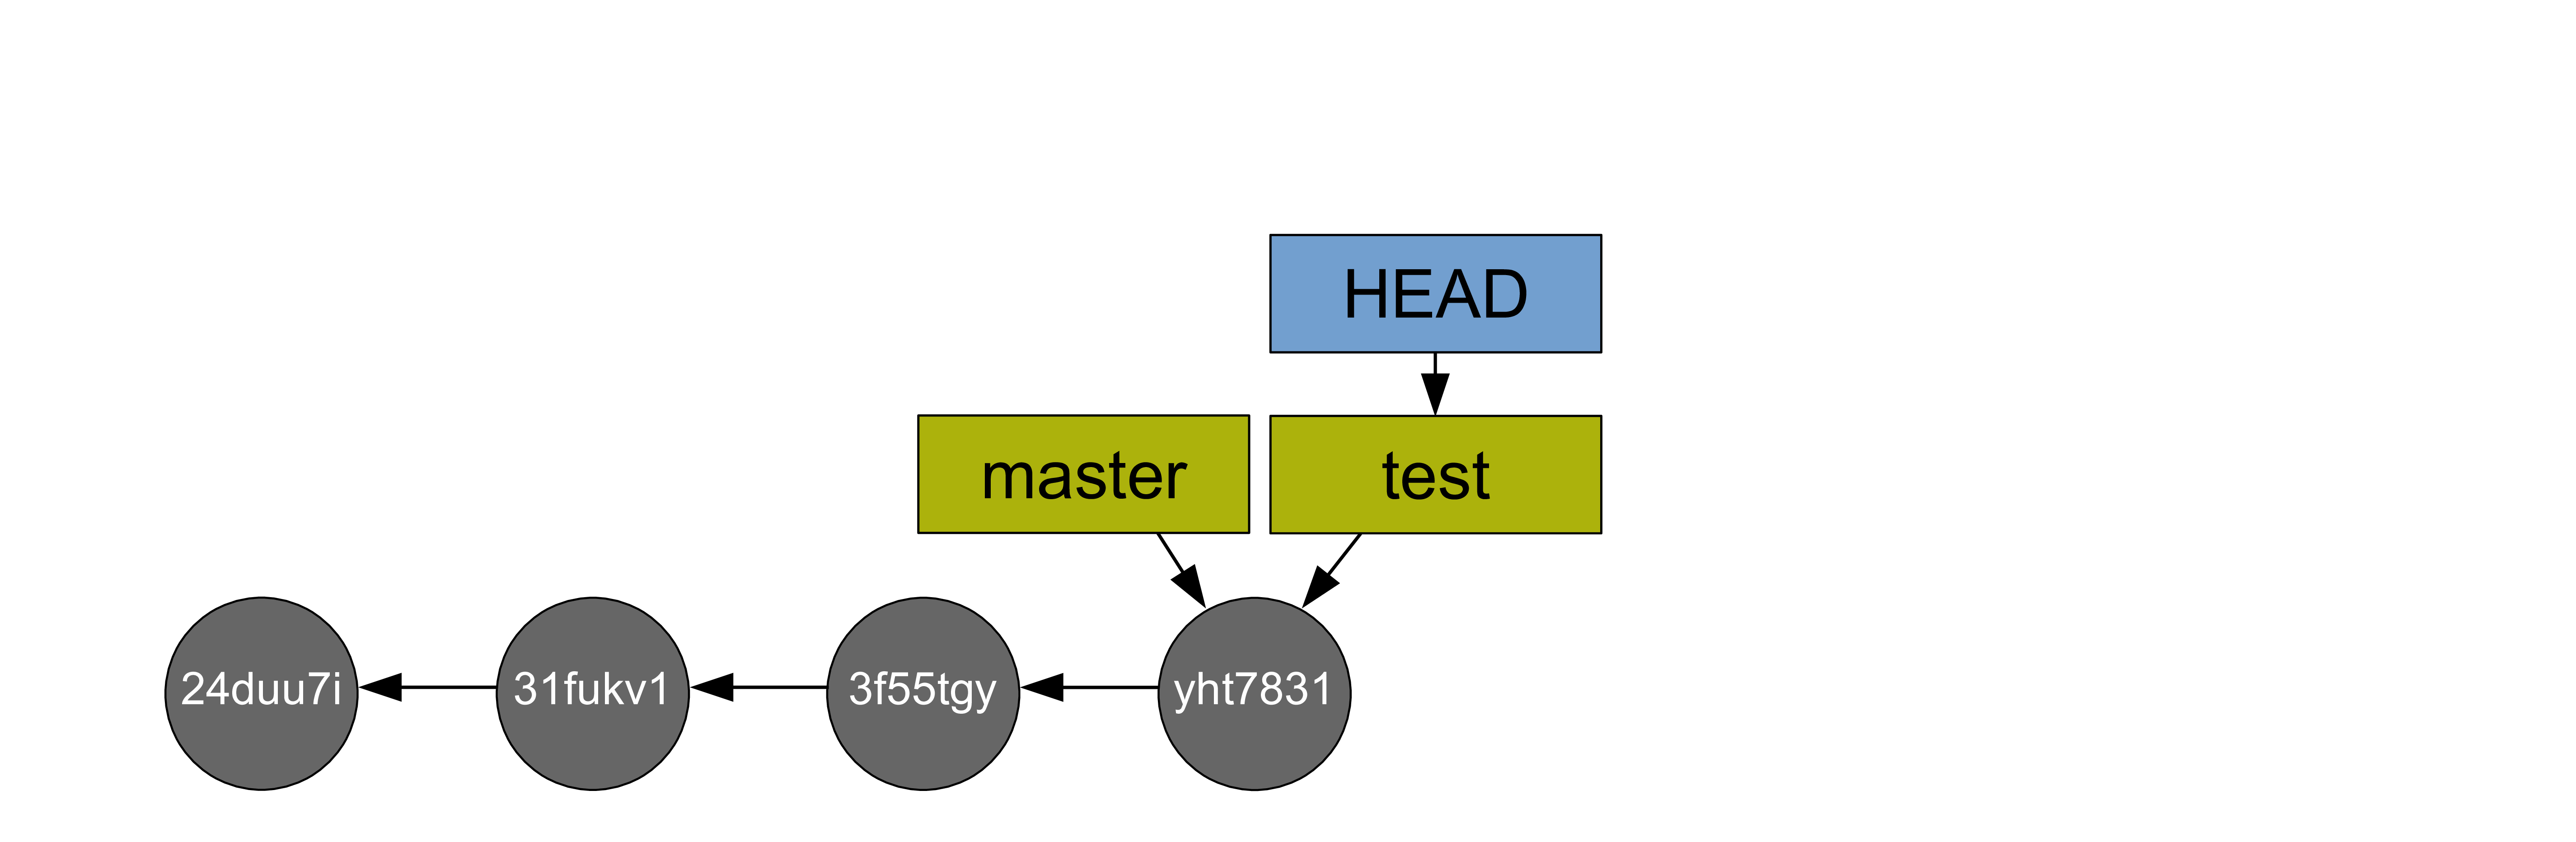
git branch test
Notice that HEAD still points to master.
How to switch to a branch?
You switch to a branch with:
git checkout <branch-name>
Example:
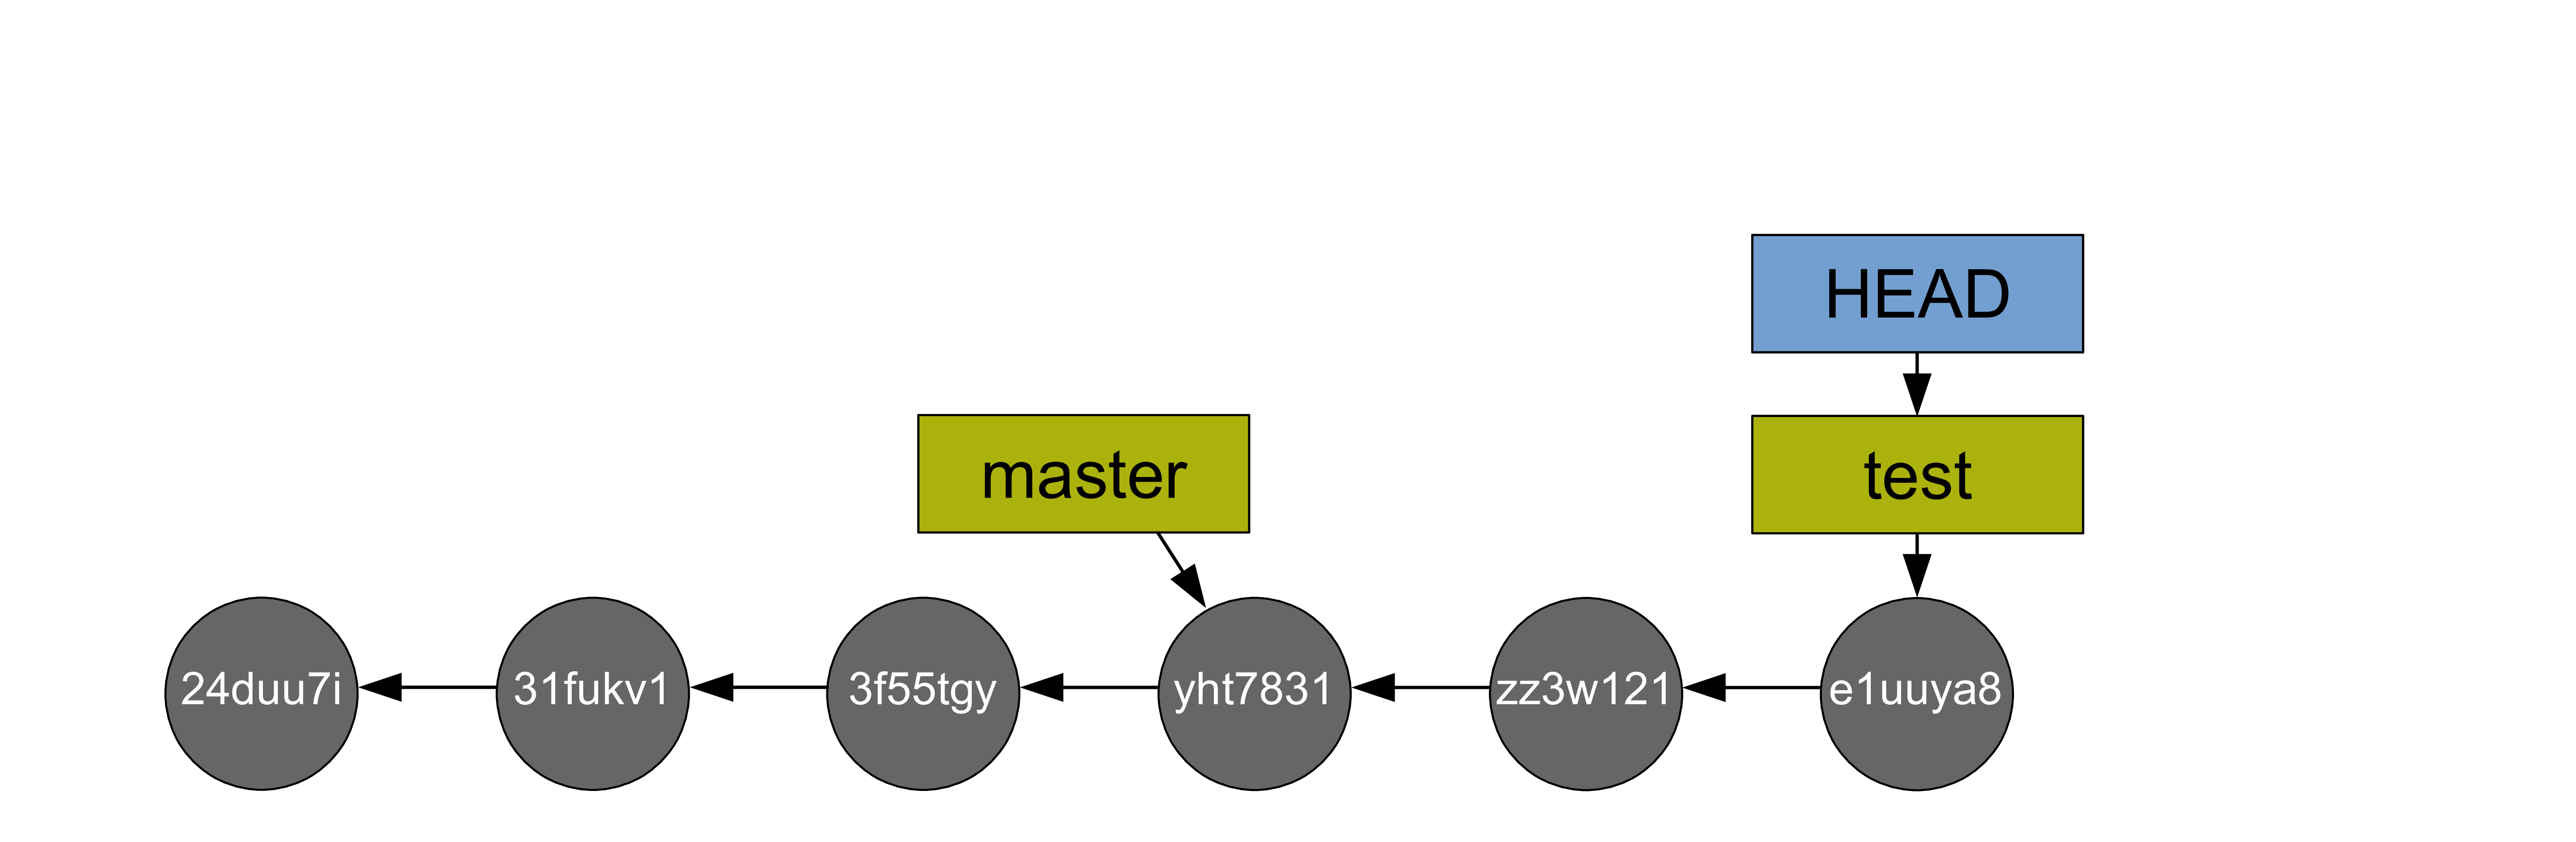
git checkout test
Creating a branch and switching to it immediately
When you create a branch, most of the time you want to switch to it. There is a handy way to create a branch and switch to it immediately:
git checkout -b <branch-name>
Deleting branches
You can delete a branch with:
git branch -d <branch-name>
Getting information on branches
# list local branches (current branch marked with *)
git branch
git branch -v   # show sha1 and commit message for each head
git branch -vv  # also show upstream branch

# list remote branches
git branch -r

# list all branches
git branch -a
Merging branches
Fast-forward merge
Here is a classic workflow with branches:
You just checked out the branch test. Now you make a series of commits on that branch:
master).
First, you checkout master (to merge, you need to be on the branch you want to merge into):
git checkout master

test into master:
git merge test
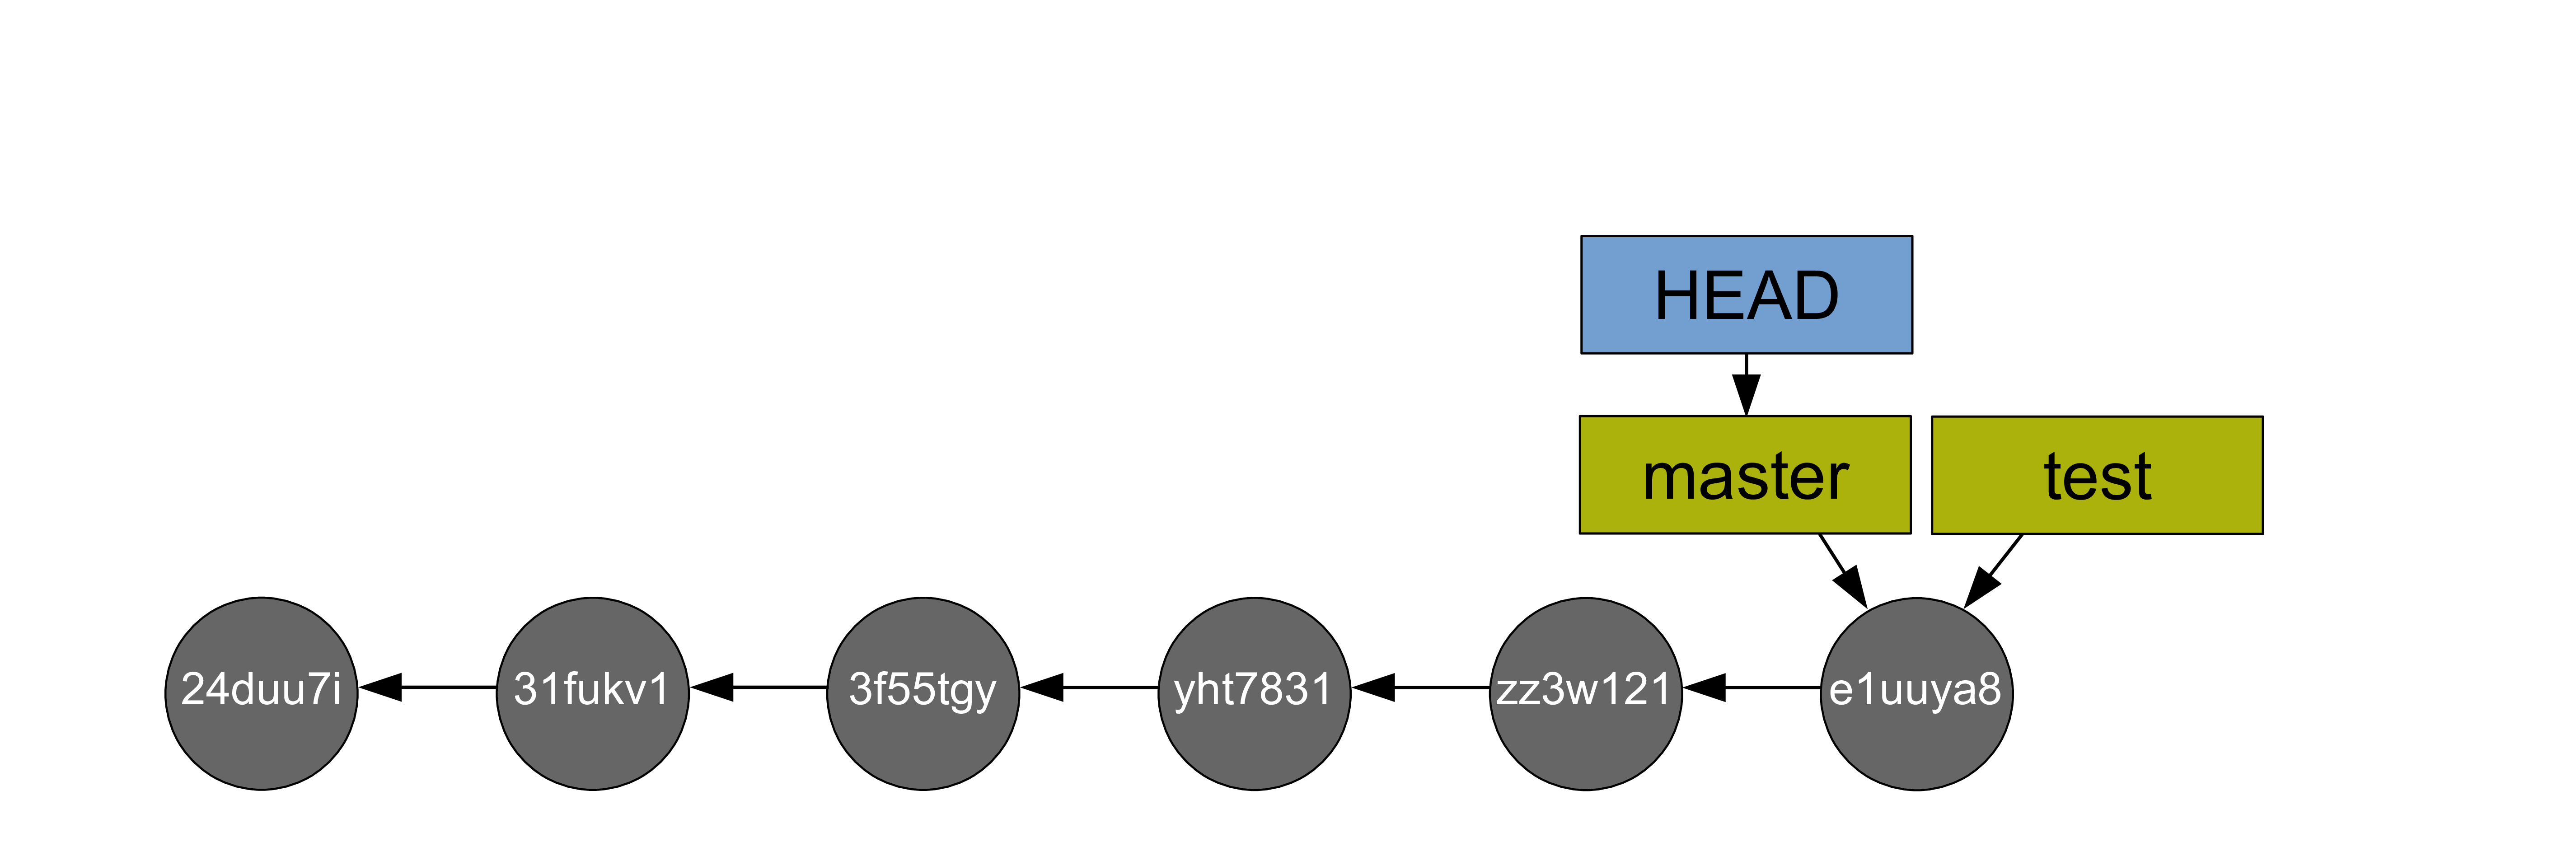
master branch could be fast-forwarded to the branch test.
Now, you can delete the branch test which has become useless:
git branch -d testAnd you have:
Merge commit
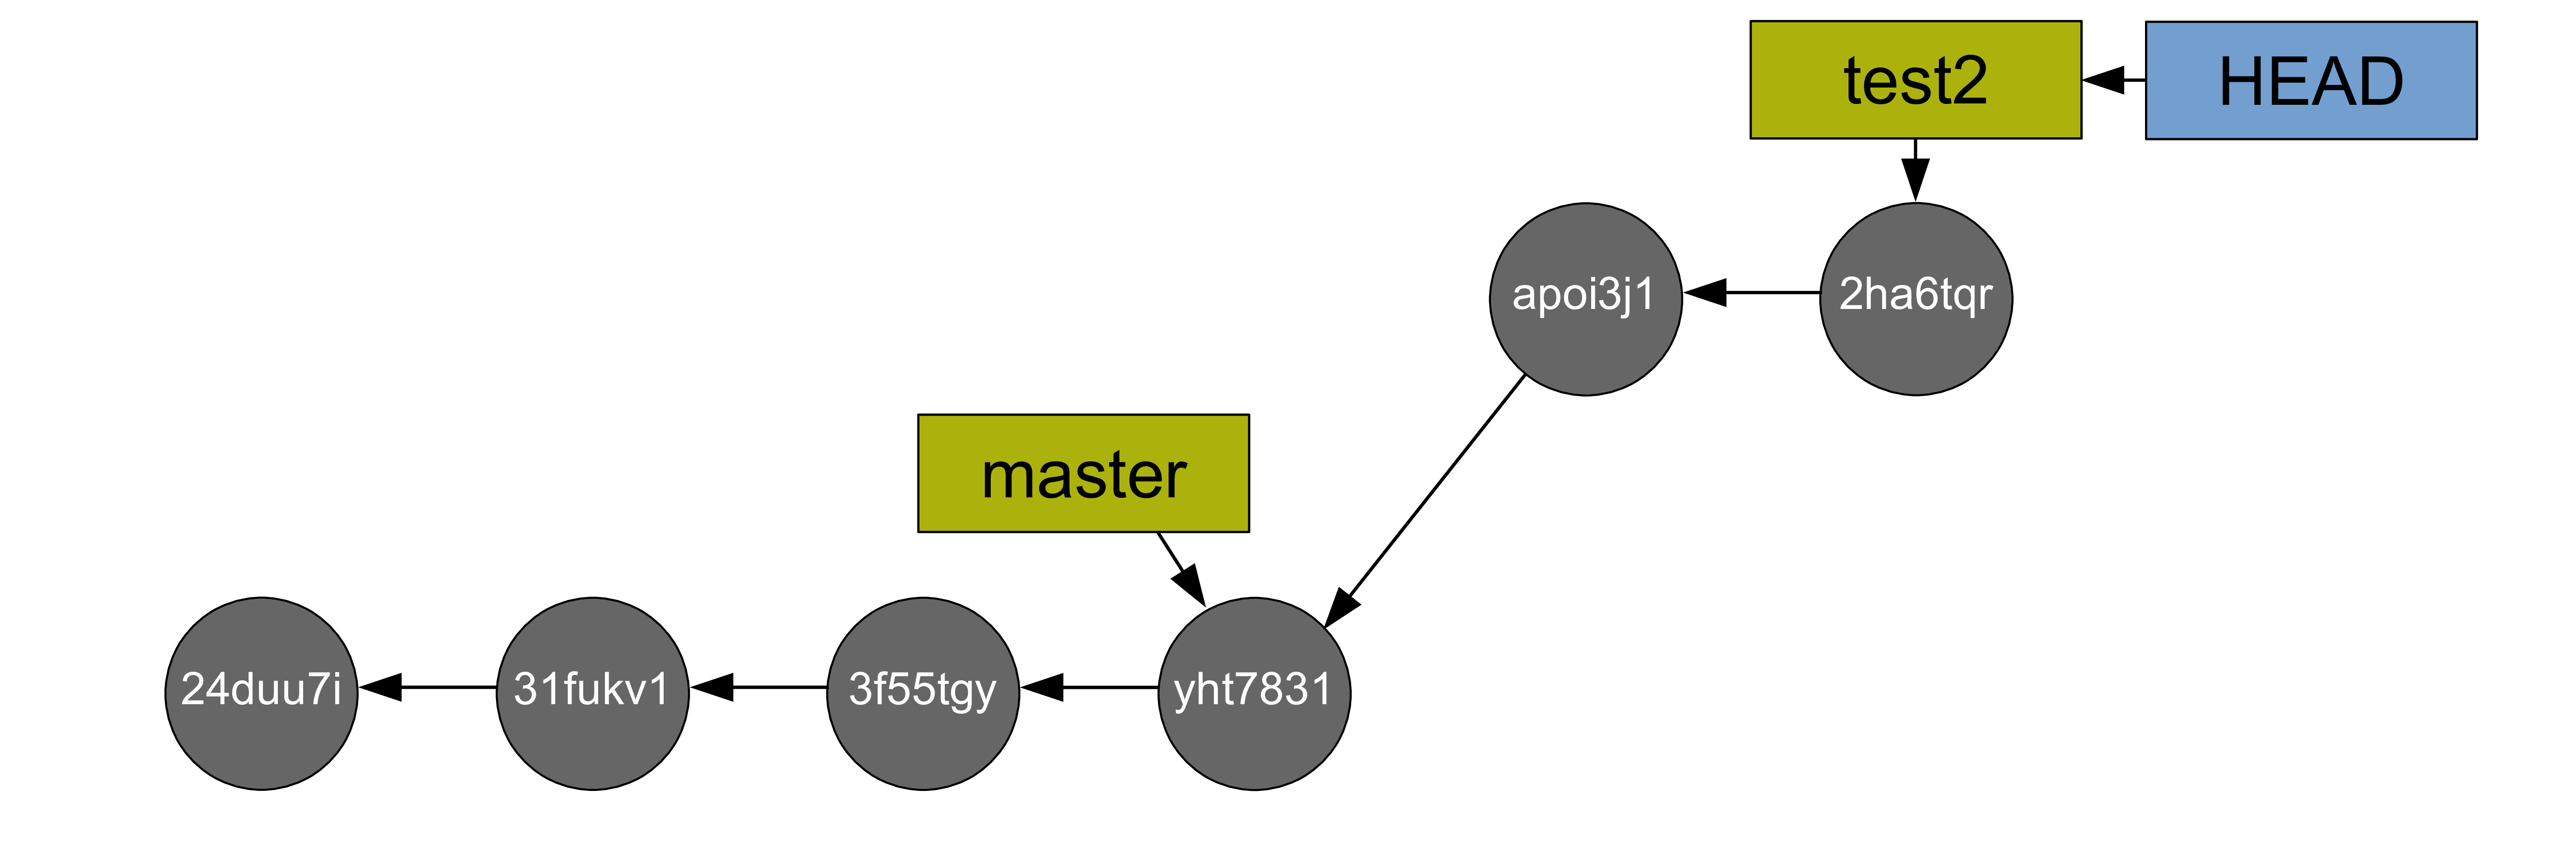
Let's consider another common workflow with a branch test2 starting from the same situation (you just created and checked out test2):

test2:
master:
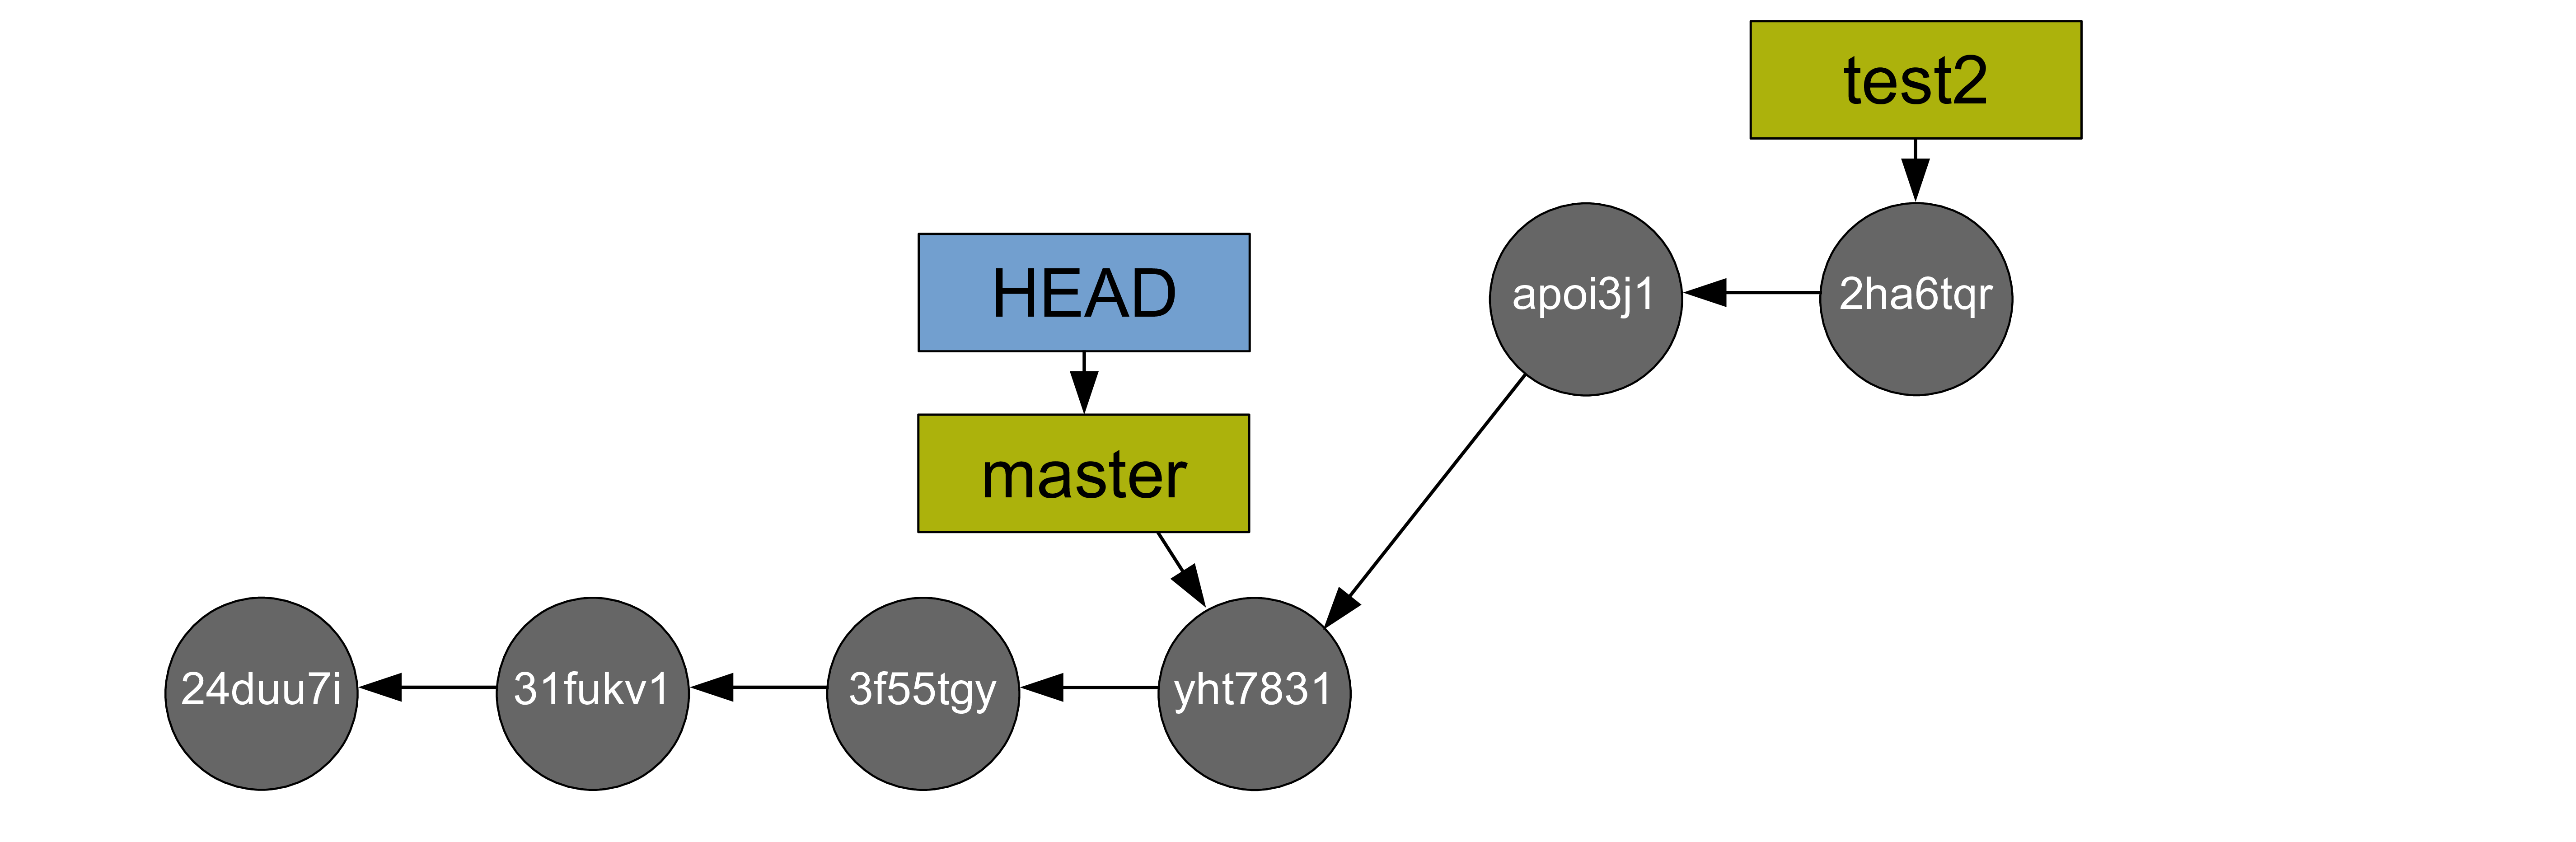
master:
test2 into master, you need to be on master, but that's already the case. So you can run:
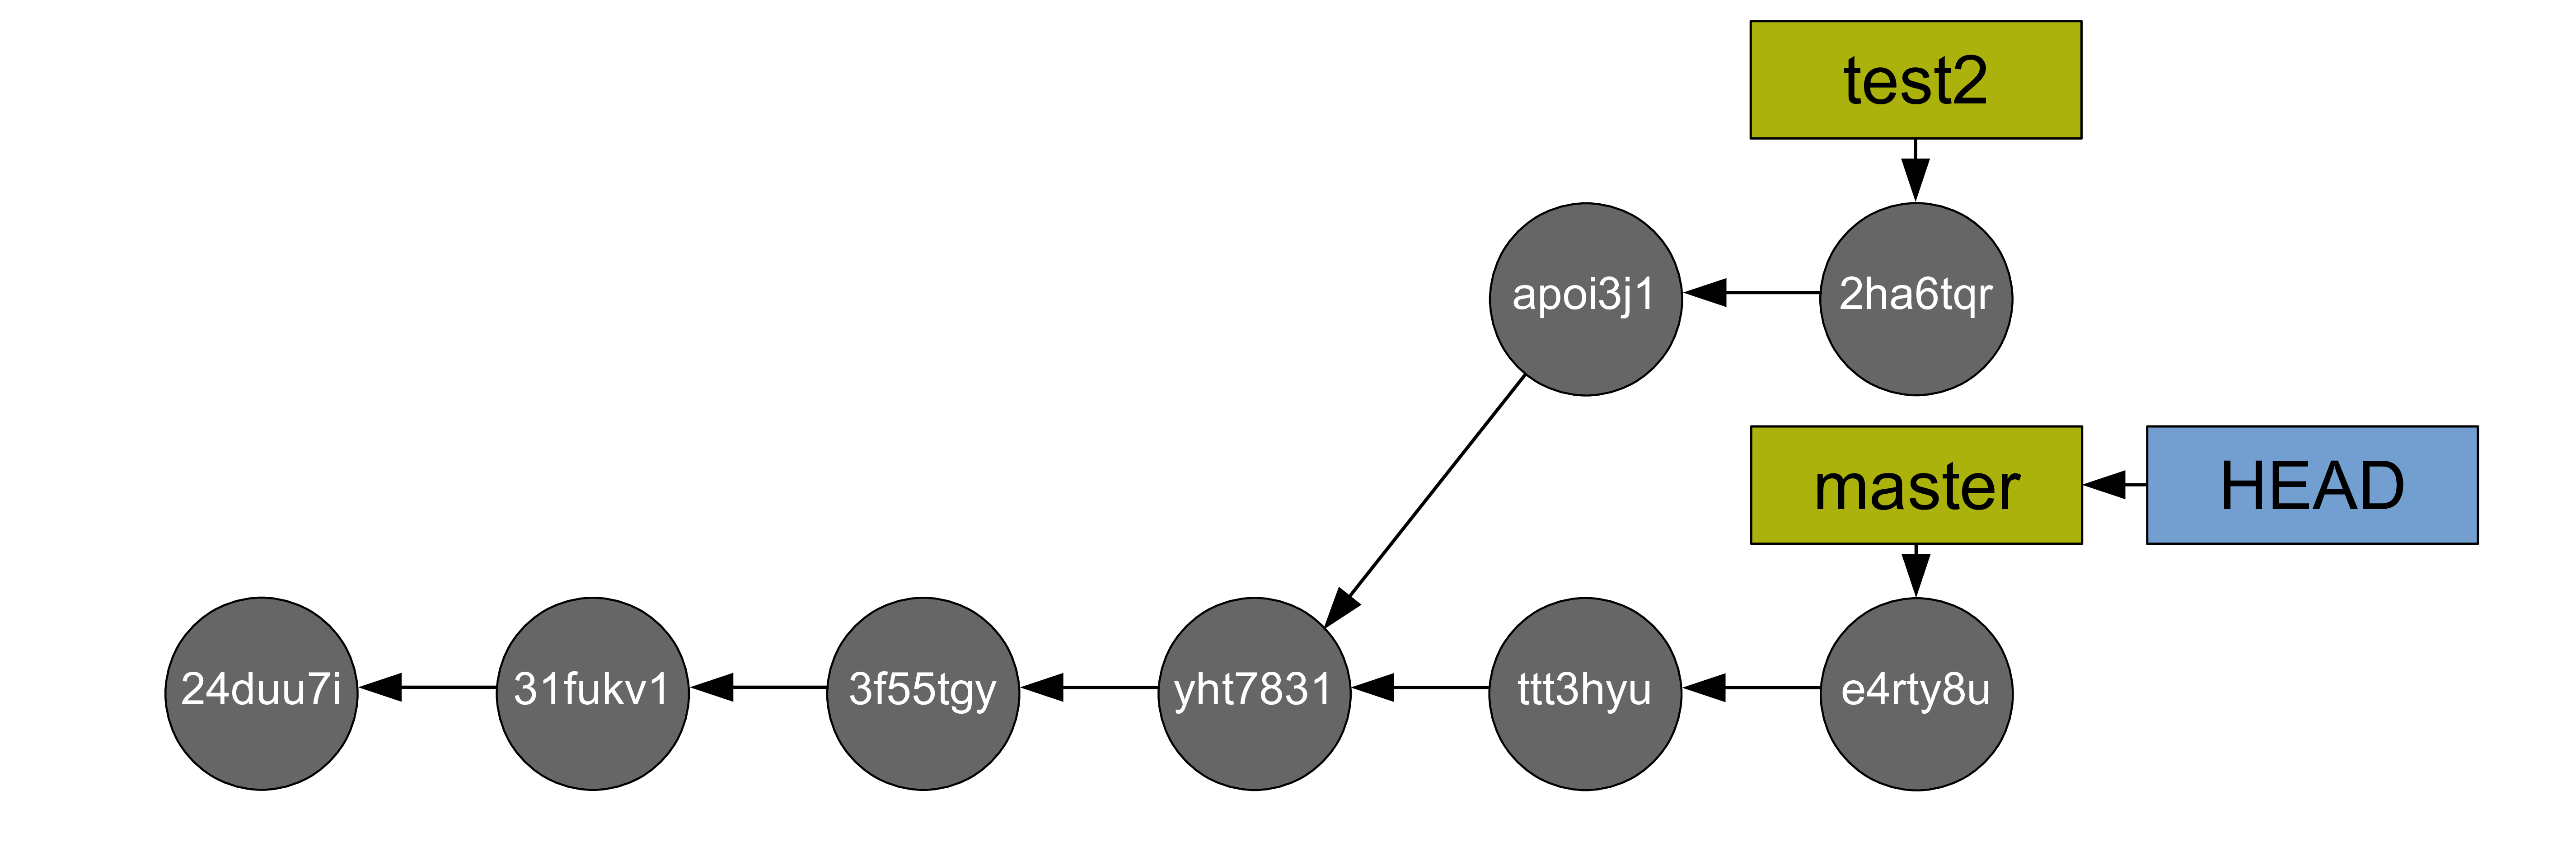
git merge test2and you get:
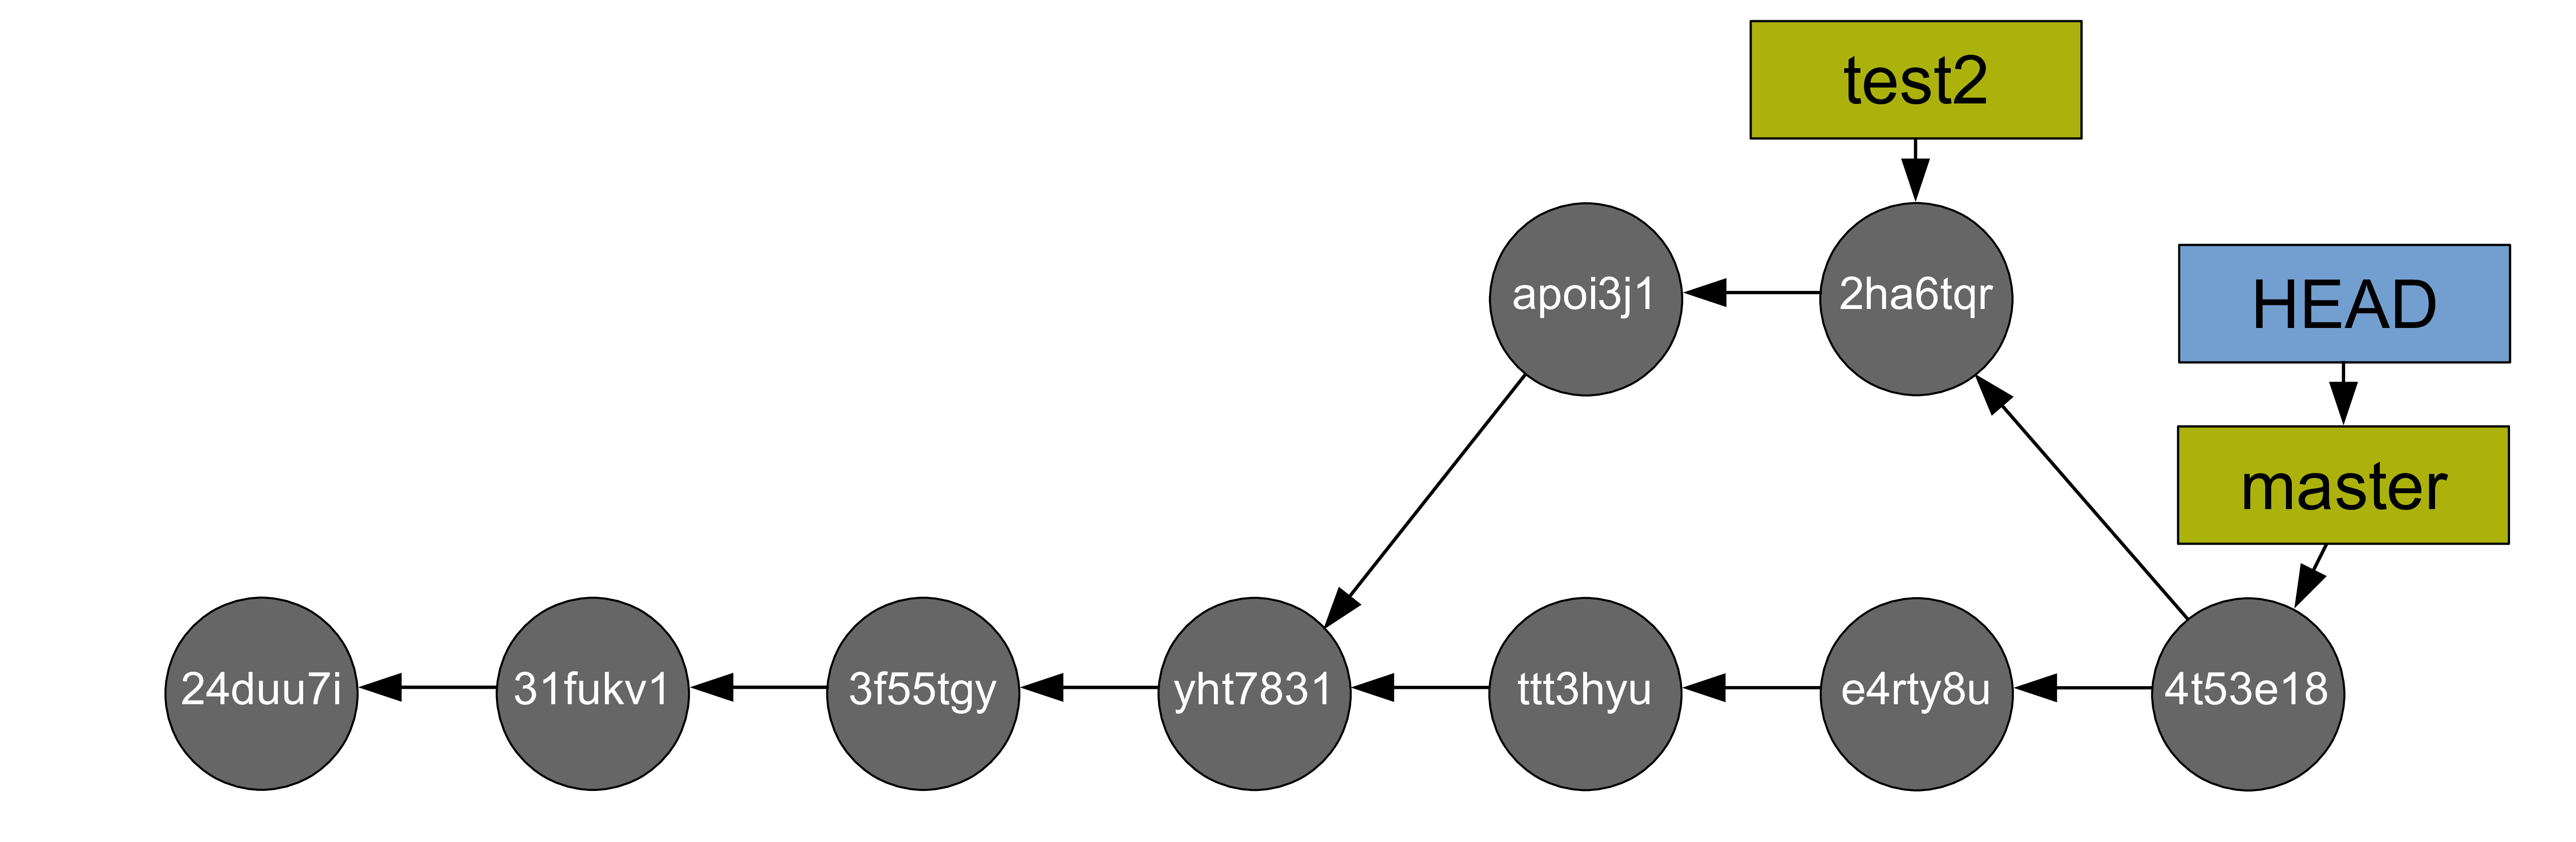
Note that in order to make the merge in this scenario, Git had to create a new commit, called a merge commit and that this commit has 2 parents.
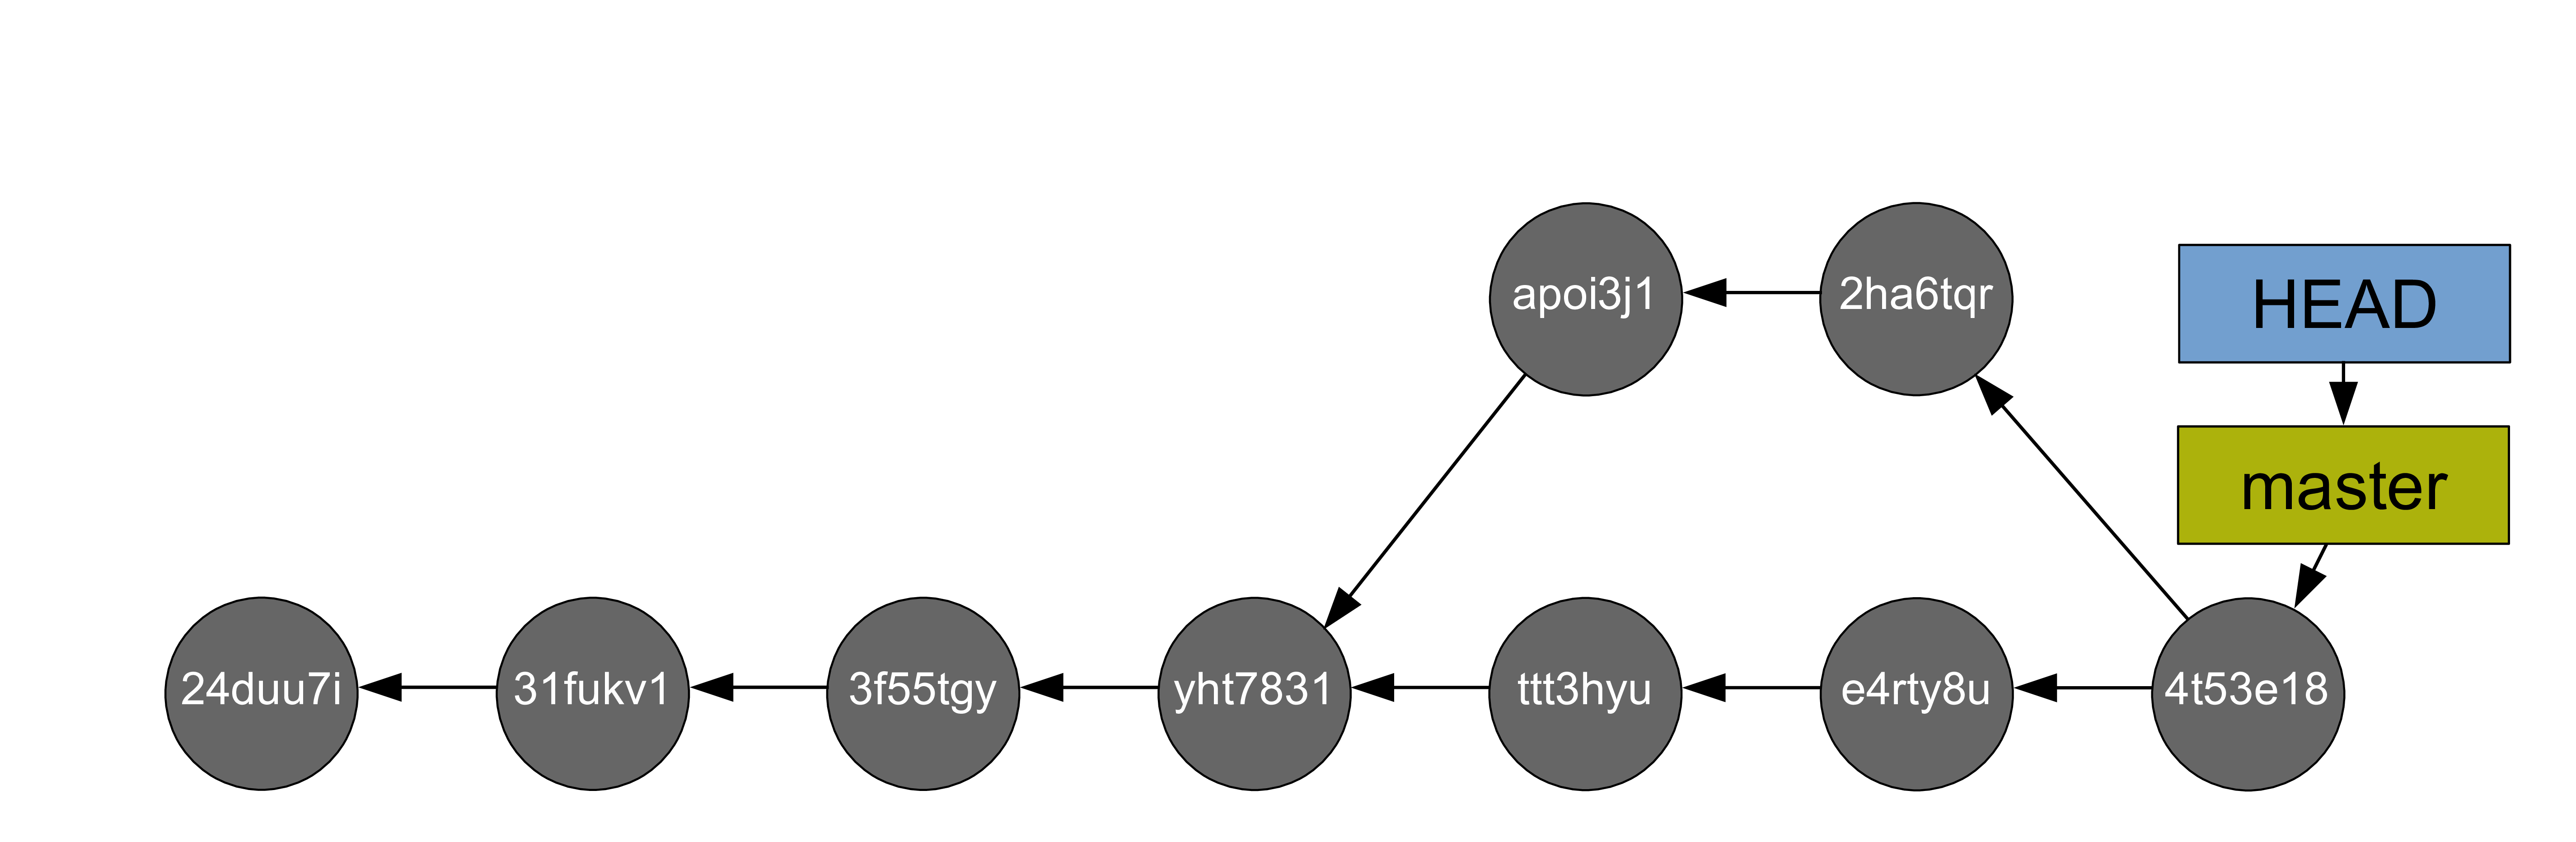
Finally, you can now delete the test2 branch with git branch -d test2 to get:
For more information on branches, I recommend to read the chapter on branches in the Pro Git book, an open source project freely available online.
Resolving conflicts
If the same section of a file is changed on different branches, Git cannot know which version you would like to keep. The merge gets interrupted until you resolve the conflict.
To resolve the conflict, you can use a merge tool. Run git mergetool --tool-help to get help setting this up.
Many GUI applications for Git as well as powerful text editors such as Emacs and Vim offer merge tools.
You can also resolve the conflict manually in a text editor:
When a merge gets interrupted due to a conflict, Git tells you which file contains a conflict. Open this file and look for a section that looks like this:
<<<<<<< HEAD
Version of this section of the file on your checkedout branch
=======
Alternative version of the same section of the file
>>>>>>> alternative version
The <<<<<<< HEAD, =======, and >>>>>>> are markers added by Git to identify the alternative versions at the location of the conflict.
You have to decide which version you want to keep (or write yet another version), remove the 3 lines with the markers, and remove the line(s) with the version(s) you do not want to keep.