Introduction to Git & GitHub
Abstract
Git is a powerful version control system allowing to record, access, and restore the history of projects. After setting up remotes on the internet or other network, Git is also a mighty collaboration tool.
In this workshop, we will:
- explain what version control is and what the benefits are,
- get you started with Git,
- use the popular online Git repository hosting site GitHub to introduce a workflow typical of many companies.
Why version control?


Which version control system?
Looking at Google trends for web searches, there is a clear winner…

Install Git
MacOS & Linux users
Install Git from the official website.
Windows users
Install Git for Windows. This will also install Git Bash, a Bash emulator.
Create a free GitHub account
Sign up for a free GitHub account.
Later on, to avoid having to type your password all the time, you should set up SSH for your account.
Configure Git
User identity
git config --global user.name "<Your Name>"
git config --global user.email "<your@email>"
Example
git config --global user.name "John Doe"
git config --global user.email "john.doe@gmail.com"
Text editor
git config --global core.editor "<text-editor>"
Example for nano
git config --global core.editor "nano"
Line ending
macOS, Linux, or WSL
git config --global core.autocrlf input
Windows
git config --global core.autocrlf true
List settings
git config --list
Git documentation
Internal documentation
Man pages
git <command> --help
git help <command>
man git-<command>
Example
git commit --help
git help commit
man git-commit
Useful keybindings when you are in the pager
SPACE      scroll one screen down
b          scroll one screen up
q          quit
Command options
git <command> -h
Example
git commit -h
Online documentation
- Official Git manual
- Open source Pro Git book
Courses & workshops
- Western Canada Research Computing Git workshops
- last summer Western Canada Research Computing Git course
- last fall Western Canada Research Computing Git course
- the Software Carpentry Git lesson
Q & A
Understanding Git
Project history
Git saves the history of a project as a series of snapshots:

Those snapshots are called commits:
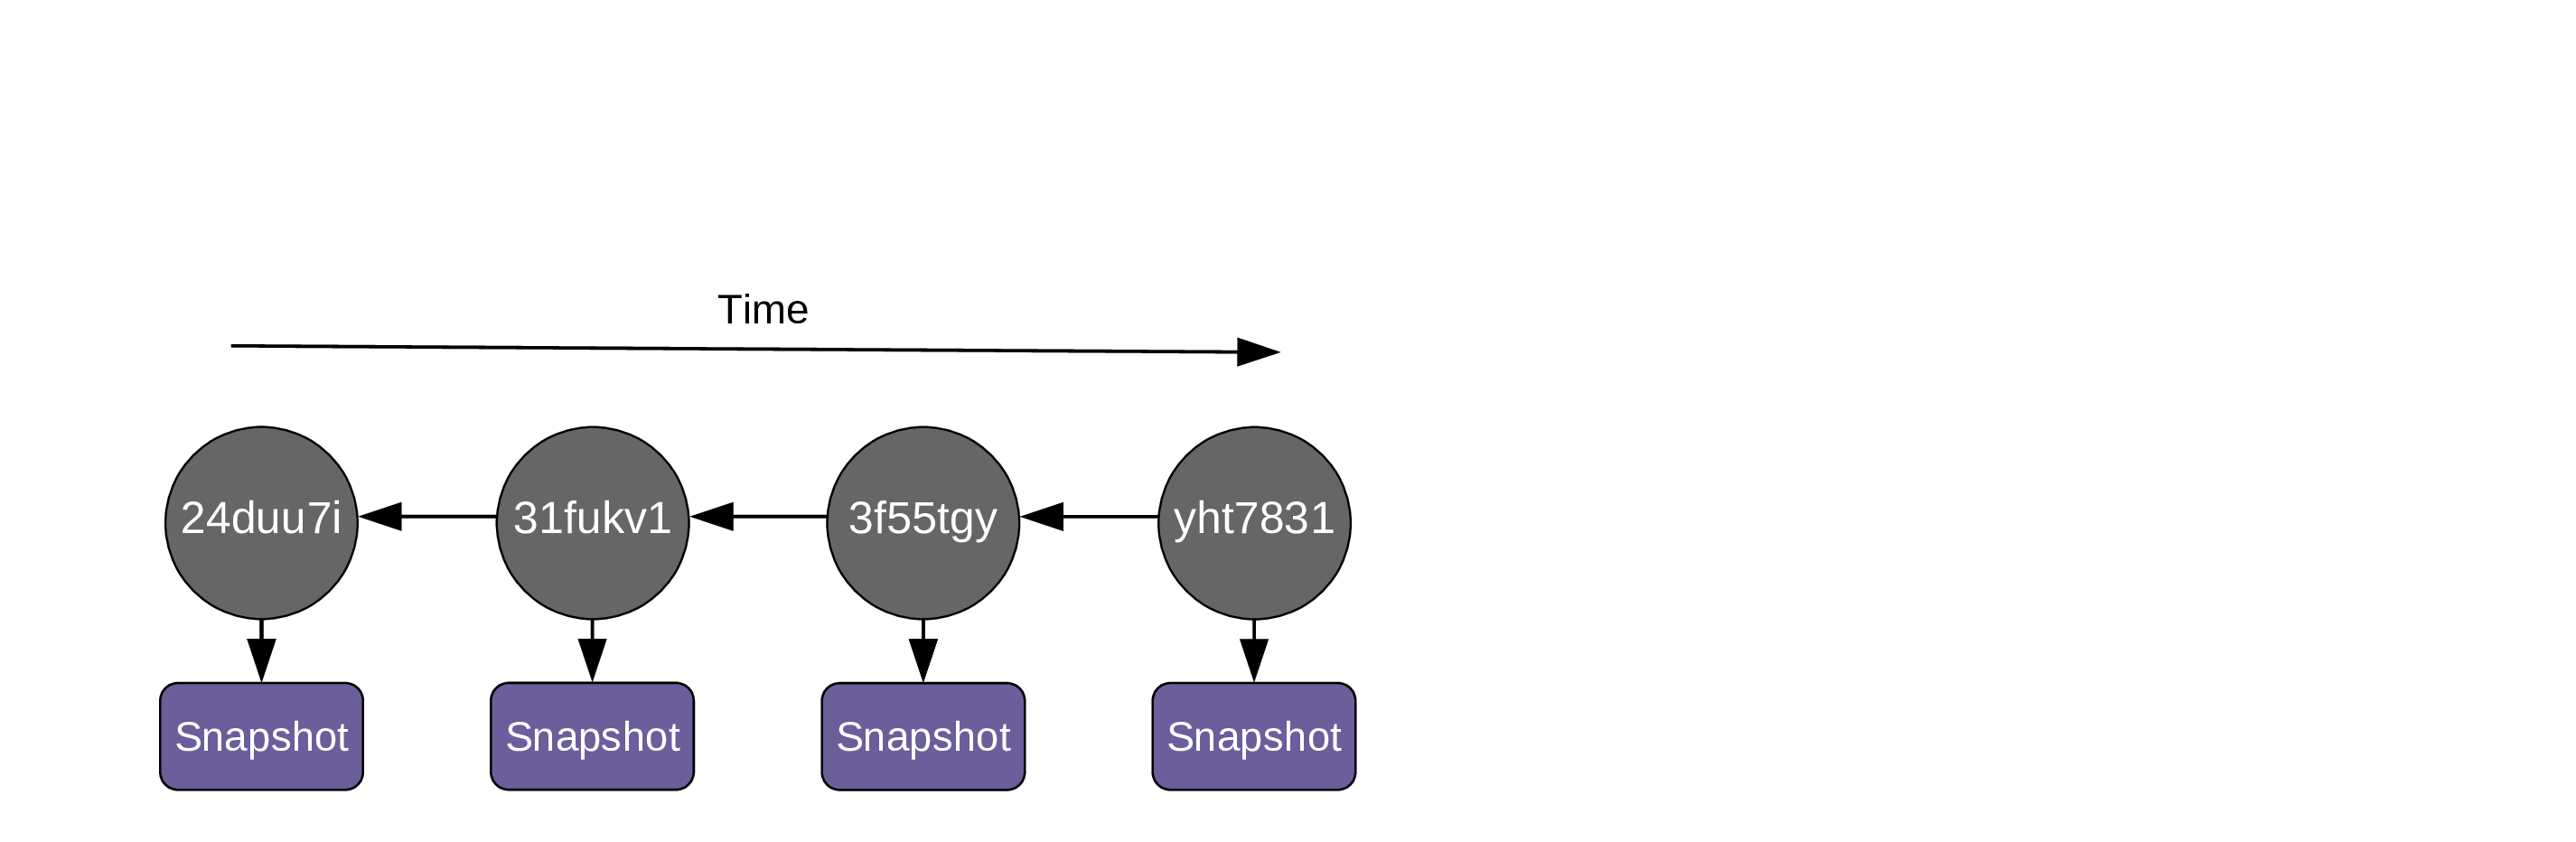
Commits are identified by unique hash:
Each commit contains these metadata:
-
author,
-
date and time,
-
the hash of parent commit(s),
-
a message.
As soon as you create the first commit, a pointer called a branch is created and it points to that commit. By default, that first branch is called main:
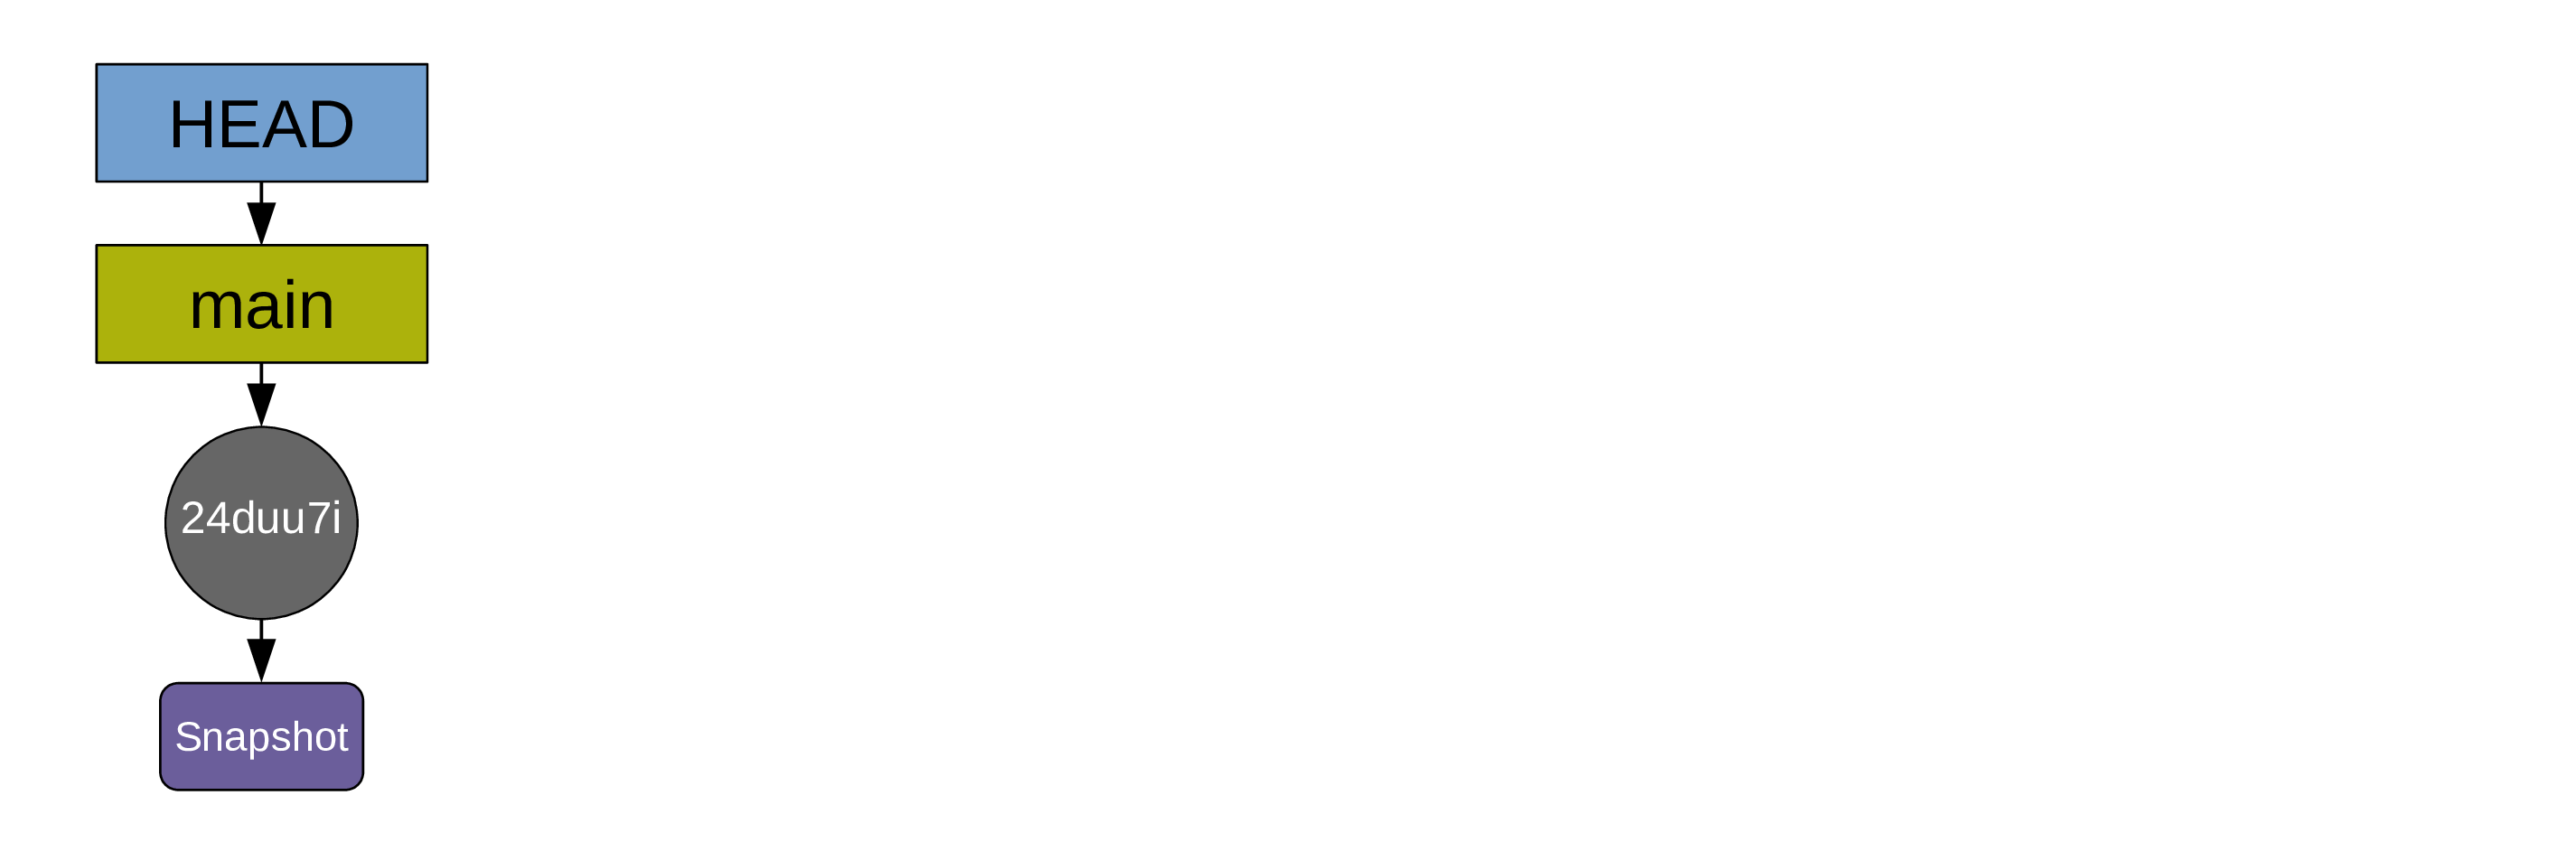
Another pointer (HEAD) points to the branch main.
HEAD indicates where we are in the project history.
Recording history
As you create more commits, the history grows …
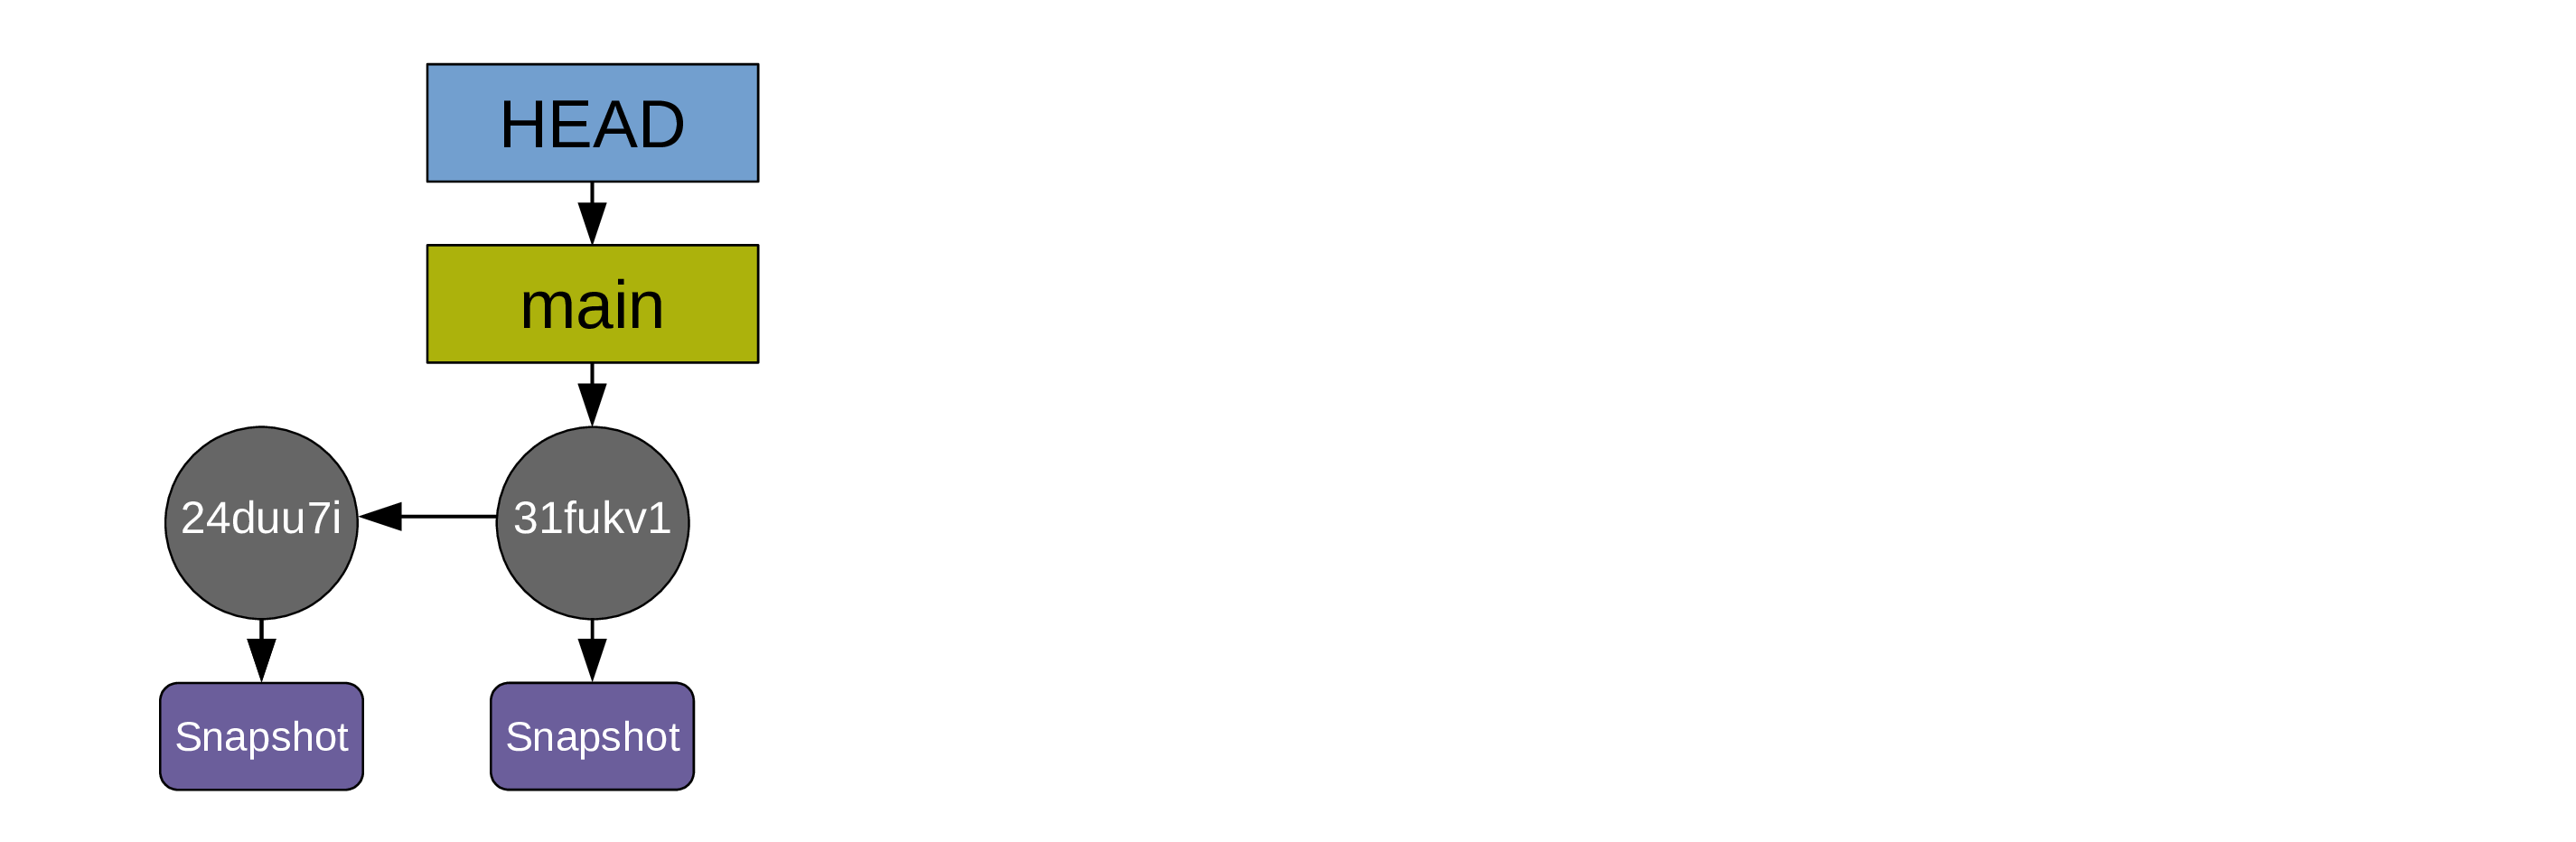
… and the pointers HEAD and main automatically move to the last commit:
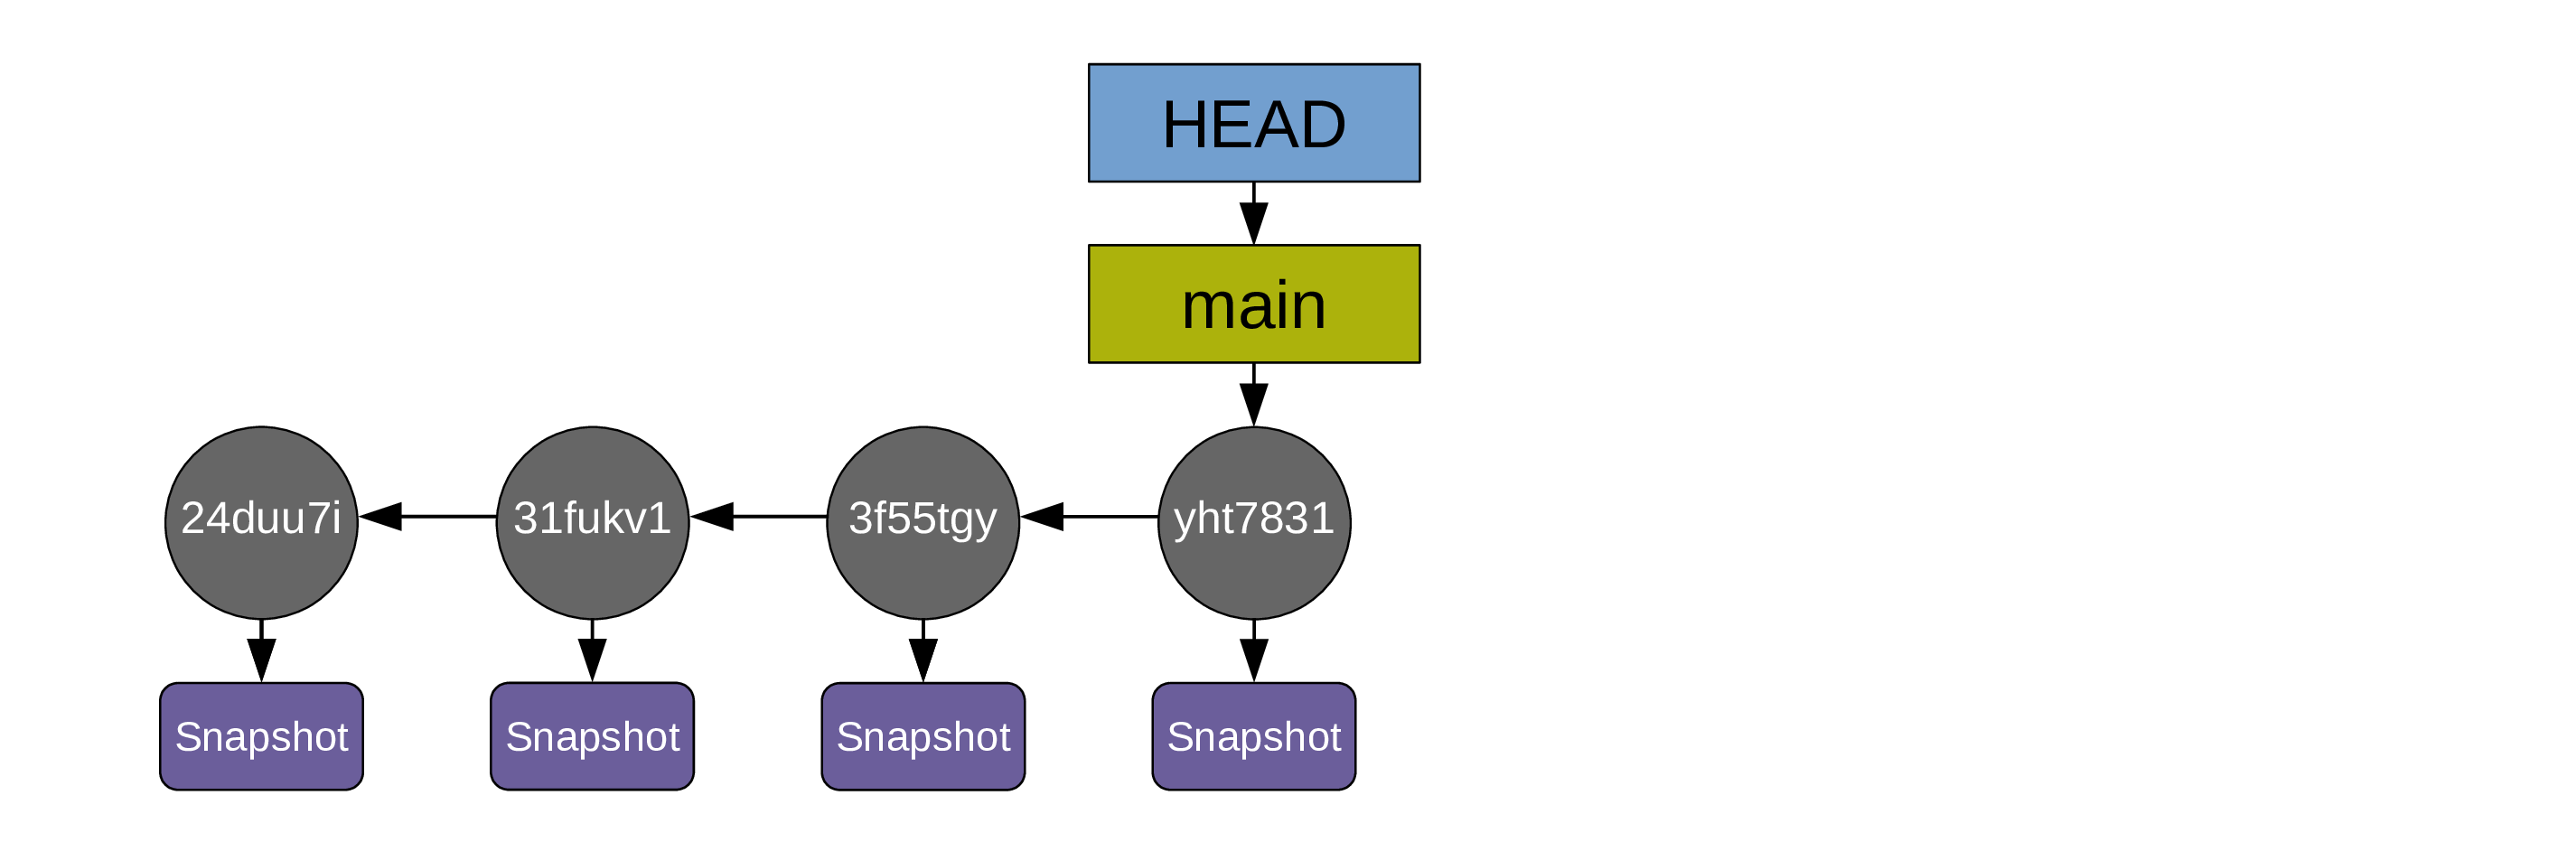
For simplicity, the diagrams can be simplified this way:

Displaying the commit history
As a list
git log --oneline
Making it more readable
git log \
    --graph \
    --date-order \
    --date=short \
    --pretty=format:'%C(cyan)%h %C(blue)%ar %C(auto)%d'`
                   `'%C(yellow)%s%+b %C(magenta)%ae'
As a graph
git log --graph
As a graph showing all commits
git log --graph --all
How does Git work?
The three trees of Git
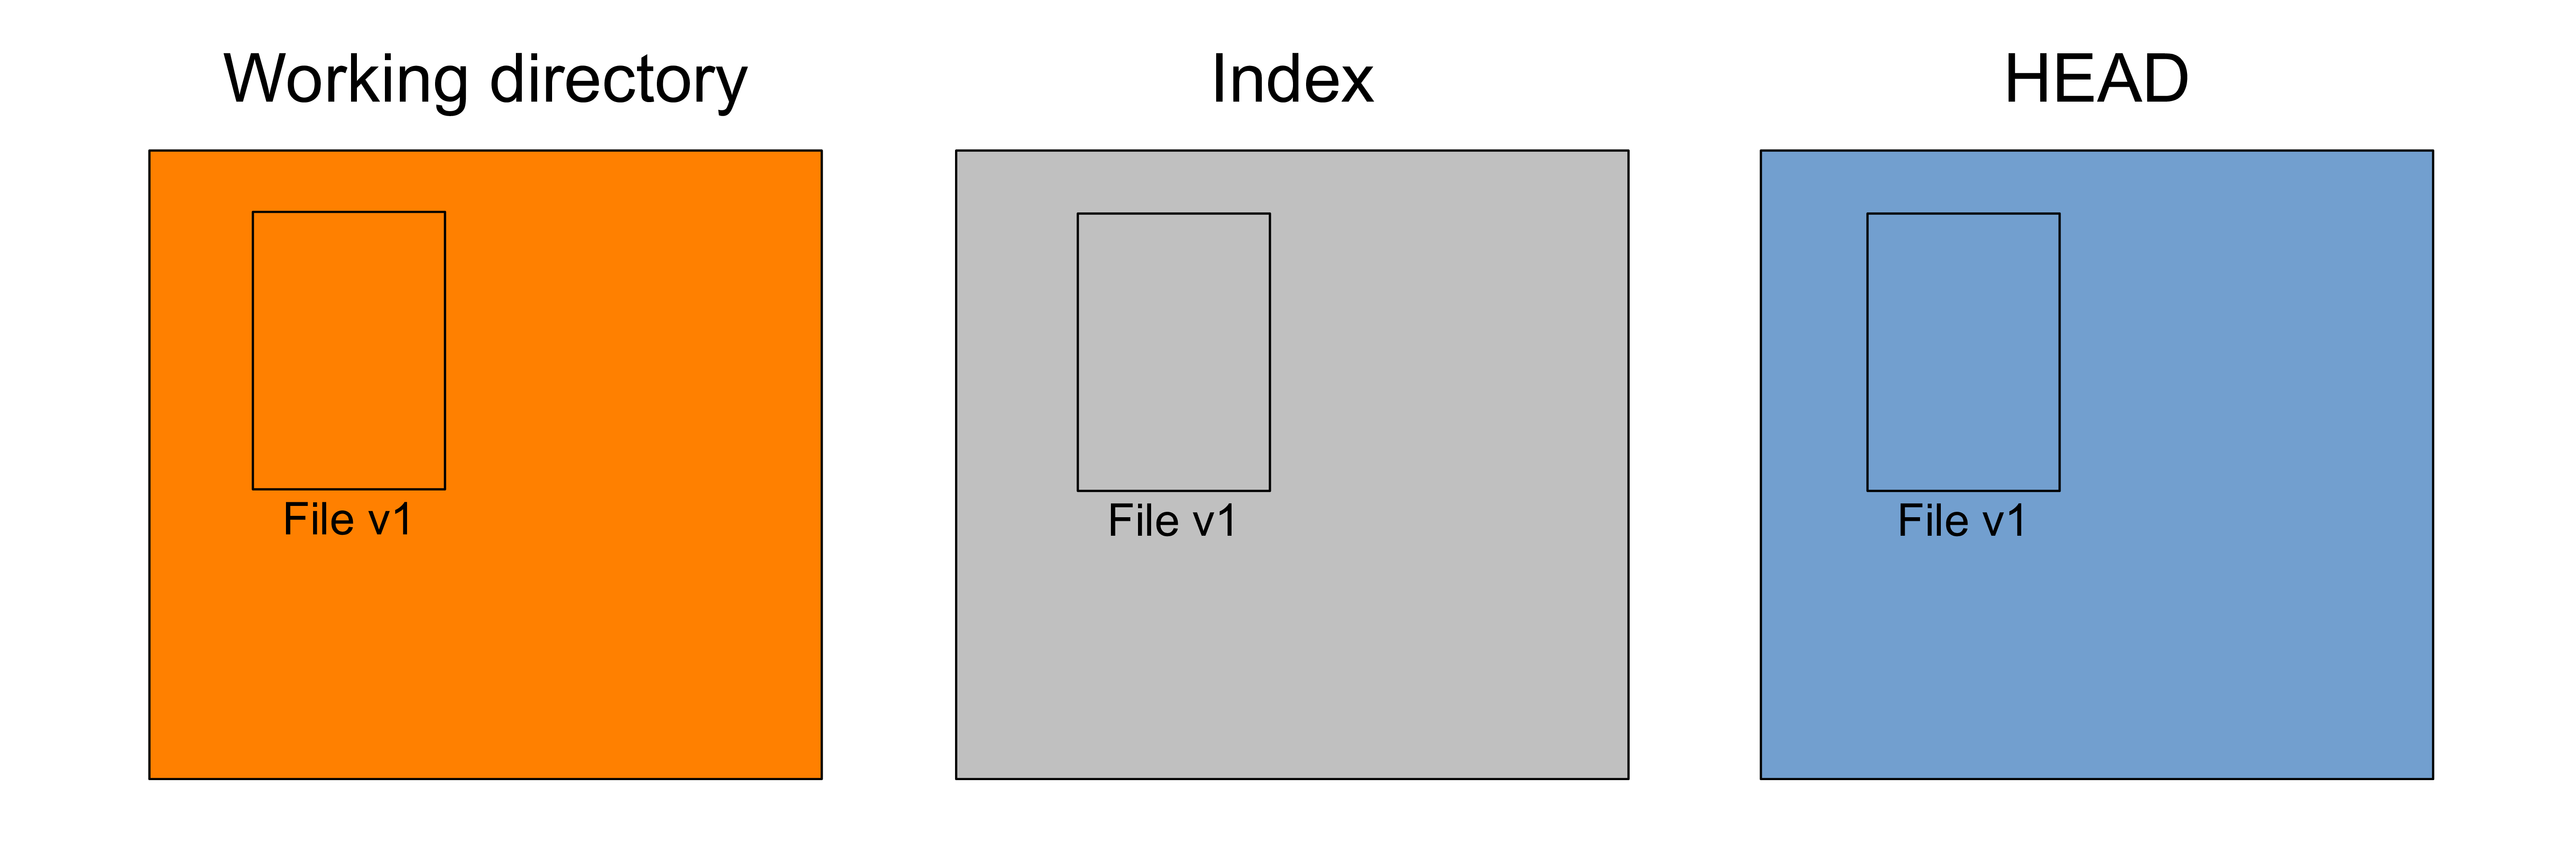
A useful representation of Git’s functioning is to imagine three file trees:

Making changes to the working tree
When you work on your project, your working tree changes:

Staging changes
You organize your next snapshot by picking and choosing some changes
git add <what-you-want-to-commit-next>
Those changes move to the index or staging area:

Creating a commit
Finally you create a commit with what is in the staging area:
git commit -m "<message>"
Remotes
What are remotes?
Remotes are copies of a project & its history.
They can be located anywhere, including on external drive or on the same machine as the project, although they are often on a different machine to serve as backup, or on a network (e.g. internet) to serve as a syncing hub for collaborations.
Popular online Git repository managers & hosting services:
Collaboration
3 situations
-
You create a project on your machine and want others to contribute to it (1).
-
You want to contribute to a project started by others & …
… you have write access to it (2).
… you do not have write access to it (3).
(1) You start the project
Create a remote on GitHub
1. Create an empty repository on GitHub
-
Go to the GitHub website, login, and go to your home page.
-
Look for the
Repositoriestab & click the greenNewbutton. -
Enter the name you want for your repo, without spaces.
-
Make the repository public or private.
2. Link empty repository to your repo
Click on the Code green drop-down button, select SSH if you have set SSH for your GitHub account
or HTTPS and copy the address.
In the command line, cd inside your project, and add the remote:
git remote add <remote-name> <remote-address>
remote-name is a convenience name to identify that remote. You can choose any name, but since Git automatically call the remote origin when you clone a repo, it is common practice to use origin as the name for the first remote.
git remote add origin git@github.com:<user>/<repo>.git
git remote add origin https://github.com/<user>/<repo>.git
If you are working alone on this project and you only wanted to have a remote for backup, you are set.
If you don’t want to grant others write access to the project, and you only accept contributions through pull requests, you are also set.
If you want to grant your collaborators write access to the project however, you need to add them to it.
Invite collaborators
-
Go to your GitHub project page.
-
Click on the
Settingstab. -
Click on the
Manage accesssection on the left-hand side (you will be prompted for your GitHub password). -
Click on the
Invite a collaboratorgreen button. -
Invite your collaborators with one of their GitHub user name, their email address, or their full name.
(2) Write access to project
Clone project
cd to location where you want your local copy, then:
git clone <remote-address> <local-name>
This sets the project as a remote to your new local copy and that remote is automatically called origin.
Without <local-name>, the repo will have the name of the last part of the remote address.
(3) No write access to project
Collaborate without write access
-
Fork the project.
-
Clone your fork on your machine.
-
Add the initial project as a second remote & call it
upstream.
Working with remotes
Get information on remotes
List remotes:
git remote
List remotes with their addresses:
git remote -v
Get more information on a remote:
git remote show <remote-name>
git remote show origin
Manage remotes
Rename a remote:
git remote rename <old-remote-name> <new-remote-name>
Delete a remote:
git remote remove <remote-name>
Change the address of a remote:
git remote set-url <remote-name> <new-url> [<old-url>]
Get data from a remote
If you collaborate on a project, you have to get the data added by your teammates to keep your local project up to date.
To download new data from a remote, you have 2 options:
-
git fetch -
git pull
Fetch changes
Fetching downloads the data from a remote that you don’t already have in your local version of the project:
git fetch <remote-name>
The branches on the remote are now accessible locally as <remote-name>/<branch>. You can inspect them or you can merge them into your local branches.
git fetch origin
Pull changes
Pulling fetches the changes & merges them onto your local branches:
git pull <remote-name> <branch>
git pull origin main
If your branch is already tracking a remote branch, you can omit the arguments:
git pull
Push to a remote
Uploading data to the remote is called pushing:
git push <remote-name> <branch-name>
git push origin main
You can set an upstream branch to track a local branch with the -u flag:
git push -u <remote-name> <branch-name>
git push -u origin main
From now on, all you have to run when you are on main is:
git push
Submit a pull request
-
Pull from
upstreamto update your local project. -
Create & checkout a new branch.
-
Make & commit your changes on that branch.
-
Push that branch to your fork (i.e.
origin— remember that you do not have write access toupstream). -
Go to the original project GitHub’s page & open a pull request.